

There is something especially satisfying about turning caramel into a frozen dessert. Instead of relying on a topping added at the end, this recipe builds caramel flavor directly into a rich ice cream base, so every spoonful has a deep buttery sweetness with a subtle toasted edge. The result is smooth enough for a neat scoop but soft enough to become wonderfully creamy as it sits for a few minutes.
This homemade caramel ice cream uses a cooked custard base, which gives the finished dessert a rich texture and helps balance the sweetness of the caramel. A little salt keeps the flavor from becoming flat, while vanilla rounds everything out. You will need an ice cream maker for the best texture, but the preparation itself is straightforward once you understand the few important steps. Serve it on its own, pair it with warm brownies, or add a little extra caramel sauce for an indulgent dessert.
Recipe Information
| Detail | Information |
| Prep Time | 20 minutes |
| Cook Time | 20 minutes |
| Chilling Time | 4 hours |
| Churning Time | 20–25 minutes |
| Freezing Time | 4 hours |
| Total Time | About 8 hours 45 minutes |
| Yield | About 6–8 servings |
| Recipe Type | Homemade Ice Cream |
| Difficulty | Intermediate |
Why You’ll Love This Recipe
This caramel ice cream recipe focuses on building flavor instead of simply making a sweet dairy base and adding caramel at the end.
The caramel is cooked separately, allowing the sugar to develop a deeper flavor before it is blended into the custard. That extra step gives Caramel Ice Cream a more rounded caramel character without relying on a large amount of prepared sauce.
The custard base also makes a noticeable difference. Egg yolks add richness and help create a smooth consistency, while the combination of whole milk and heavy cream keeps the texture rich without making it overwhelmingly heavy.
Another advantage is that the recipe can be adjusted easily. A pinch more salt gives you a salted caramel direction, while chocolate pieces, toasted nuts, or a drizzle of caramel sauce can turn the same base into a more elaborate dessert.
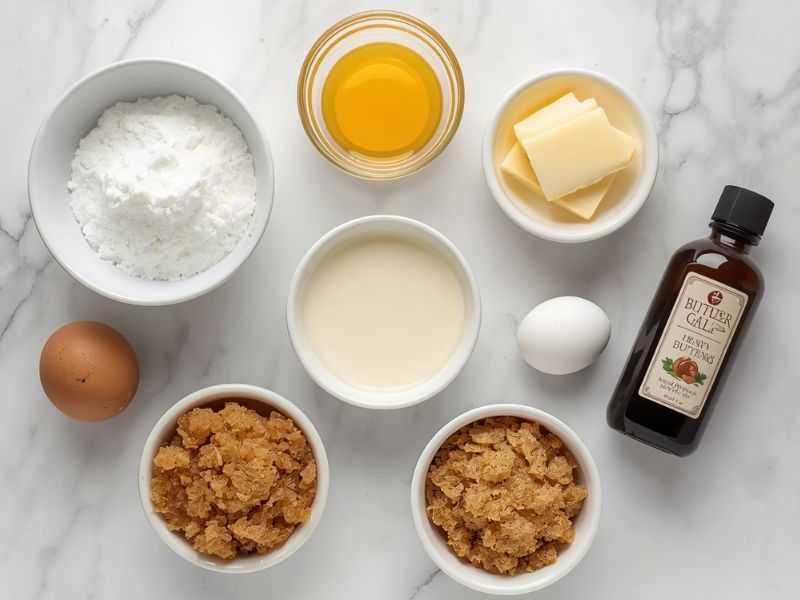
Ingredients You’ll Need
For the Caramel
- 3/4 cup granulated sugar
- 2 tablespoons water
- 1 tablespoon unsalted butter
- 1 cup heavy cream, warmed
- 1/2 teaspoon fine salt
For the Ice Cream Base
- 1 1/2 cups whole milk
- 1 cup heavy cream
- 5 large egg yolks
- 1/2 cup packed light brown sugar
- 1 teaspoon vanilla extract
Why These Ingredients Matter
Granulated sugar creates the caramel itself. Cooking it until it reaches a deep amber color gives the finished dessert its characteristic toasted sweetness.
Heavy cream contributes richness and helps create the smooth, scoopable texture of Caramel Ice Cream. Some is used with the caramel while the remaining amount becomes part of the ice cream base.
Whole milk keeps the base balanced. Using only cream can make an ice cream feel excessively heavy, while milk alone would not provide the same richness.
Egg yolks create the custard structure. They should be cooked gently so they thicken the base without scrambling.
Brown sugar adds another layer of caramel-like flavor to the custard.
Salt is especially important because it keeps the sweetness in check and makes the caramel flavor more noticeable.
Vanilla extract rounds out the dairy and caramel flavors without competing with them.
How to Make Caramel Ice Cream
1. Warm the Cream
Pour the 1 cup of heavy cream reserved for the caramel into a small saucepan and warm it over low heat until it is hot but not boiling. Keep it nearby while you prepare the sugar.
Warming the cream is important because adding cold cream to very hot caramel can cause violent bubbling and make the caramel seize suddenly.
2. Make the Caramel
Add the granulated sugar and water to a medium, heavy-bottomed saucepan. Set it over medium heat and allow the sugar to dissolve.
Once the mixture begins bubbling, continue cooking without stirring until it develops a deep amber color.
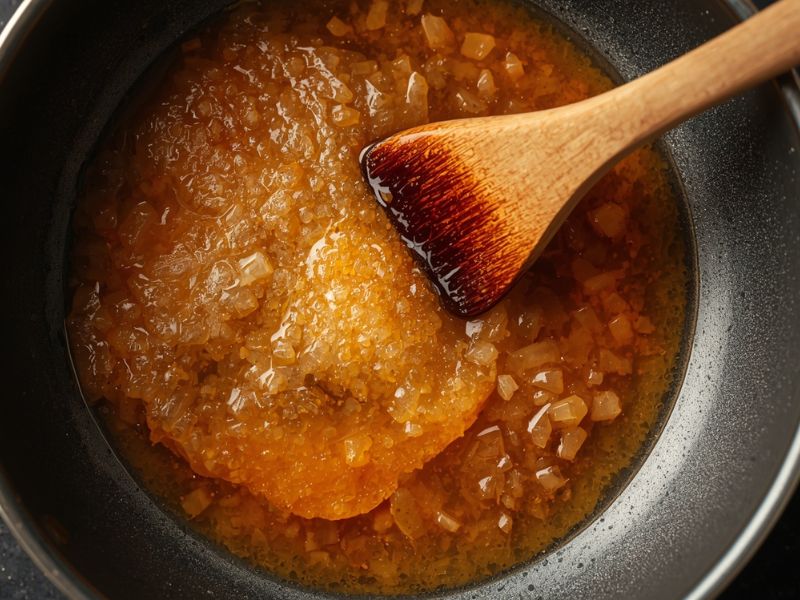
Watch it closely during this stage because caramel can move from golden to burnt surprisingly quickly.
Remove the pan from the heat and carefully whisk in the butter.
Slowly add the warm heavy cream while whisking. The mixture will bubble vigorously, so add the cream gradually rather than pouring it in all at once.
Stir in the salt, then allow the caramel to cool slightly while you prepare the custard.
3. Heat the Milk and Cream
In a clean saucepan, combine the whole milk and the remaining 1 cup of heavy cream. Heat over medium-low heat until the mixture is steaming and hot but not boiling.
Meanwhile, whisk the egg yolks and brown sugar together in a medium heatproof bowl until smooth and slightly lighter in color.
4. Temper the Egg Yolks
Slowly pour about 1 cup of the hot milk mixture into the egg yolks while whisking constantly.
This gradual process raises the temperature of the yolks without cooking them too quickly.
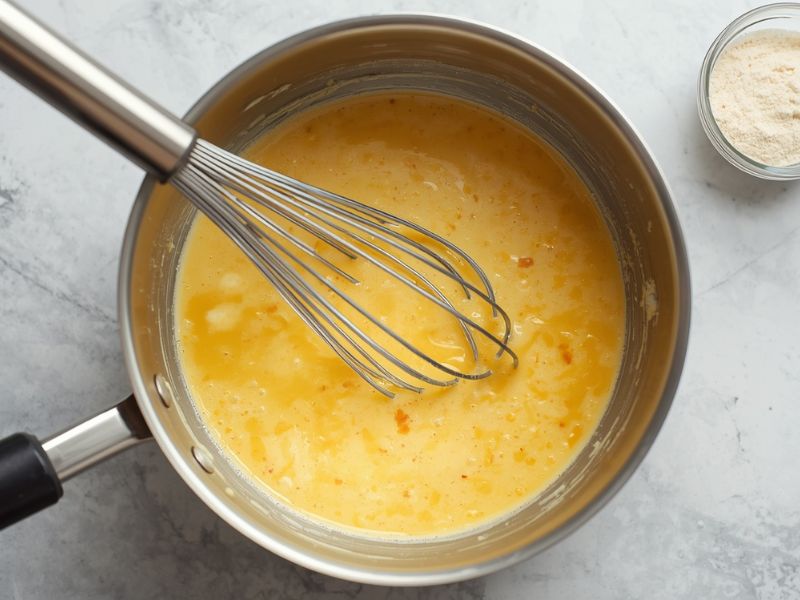
Pour the tempered egg mixture back into the saucepan with the remaining dairy.
Cook over low to medium-low heat, stirring continuously with a silicone spatula or wooden spoon. Continue until the custard thickens enough to lightly coat the back of the spoon.
Do not let the mixture boil. If it becomes too hot, the yolks can scramble and leave small cooked pieces throughout the base.
5. Combine the Custard and Caramel
Remove the custard from the heat.
Pour it through a fine-mesh strainer into a clean bowl. This removes any tiny bits of egg that may have cooked during heating and gives you a smoother base.
Stir in the vanilla extract and prepared caramel until completely combined.
Taste a small cooled spoonful and check the balance. The mixture should taste clearly caramel-forward without being dominated by salt.
6. Chill the Base Completely
Cover the bowl and refrigerate the mixture until it is thoroughly cold, preferably for at least 4 hours.
For the smoothest Caramel Ice Cream, the base should be cold before it enters the ice cream maker. A warm mixture can churn poorly and may produce a softer, less consistent texture.
7. Churn the Ice Cream
Pour the chilled mixture into your prepared ice cream maker and churn according to the manufacturer’s instructions.
Depending on the machine, this may take roughly 20 to 25 minutes. The finished Caramel Ice Cream mixture should become noticeably thicker and resemble soft-serve consistency.
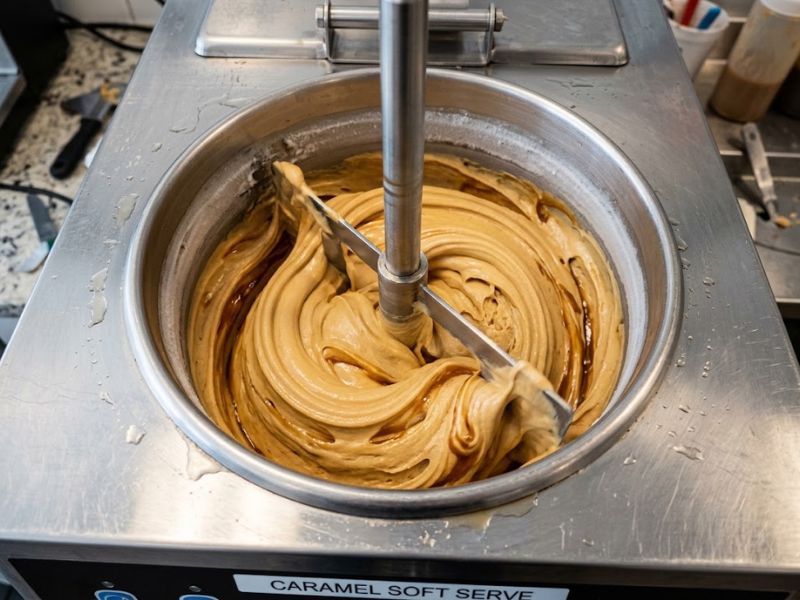
Avoid continuing to churn simply because you want it to become extremely firm inside the machine. Once the mixture reaches the appropriate texture, transfer it to the freezer.
8. Freeze Until Firm
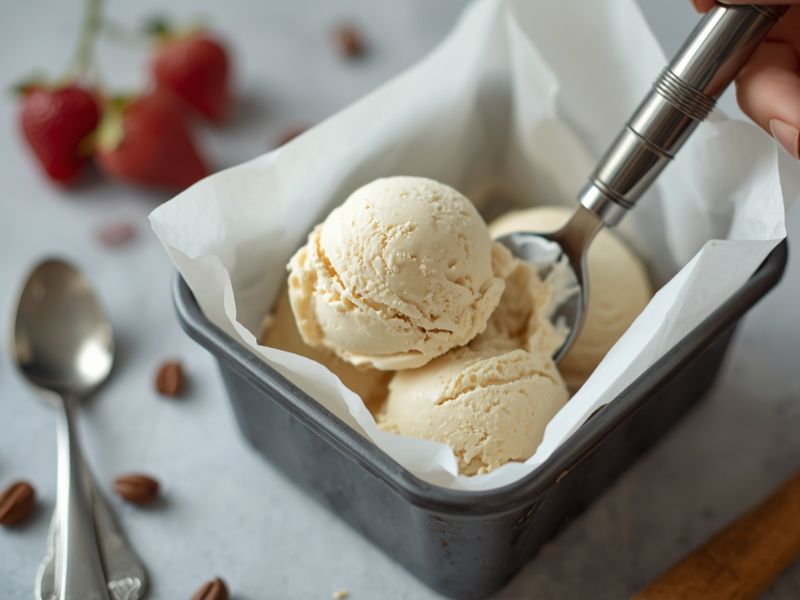
Transfer the churned ice cream to a shallow, freezer-safe airtight container.
Press a piece of parchment paper directly against the surface if possible. This reduces the amount of exposed air and helps limit ice crystals.
Freeze for at least 4 hours, or until firm enough to scoop.
Let the container sit at room temperature for about 5 minutes before serving if the ice cream is very firm.
Common Mistakes to Avoid
1. Letting the Caramel Become Too Dark
Dark caramel can quickly become bitter and burnt. Once the sugar reaches a deep amber color, remove it from the heat rather than waiting for it to become very dark.
Fix: Keep your attention on the saucepan during the final stage and have the warm cream ready before the sugar reaches the desired color.
2. Adding Cold Cream Too Quickly
Cold cream can cause hot caramel to seize and bubble aggressively.
Fix: Warm the cream first and add it gradually while whisking carefully.
3. Boiling the Custard
A custard base does not need to boil. Excessive heat can scramble the egg yolks and create a grainy texture.
Fix: Cook gently and stir continuously. Remove the mixture once it thickly coats the back of a spoon.
4. Churning a Warm Base
Putting a warm mixture into an ice cream maker can interfere with proper churning and freezing.
Fix: Give the custard enough time to become thoroughly chilled before churning.
5. Leaving the Ice Cream Exposed in the Freezer
An uncovered container allows moisture to form ice crystals on the surface and can make the texture less pleasant.
Fix: Use an airtight container and press parchment paper directly against the surface before sealing.
Tips for the Best Texture and Flavor
- Use full-fat dairy. Whole milk and heavy cream provide the fat needed for a rich, smooth frozen texture.
- Watch the caramel carefully. The difference between pleasantly toasted and bitter can happen quickly.
- Chill thoroughly. A properly chilled custard churns more effectively and freezes into a better texture.
- Don’t rush the freezing stage. Freshly churned ice cream is soft, but it needs several hours in the freezer to become scoopable.
- Let it soften slightly before serving. A few minutes at room temperature can make homemade much easier to scoop.
- Use a shallow container when possible. A wider, shallower container can help the ice cream firm up more evenly.
Variations and Serving Ideas
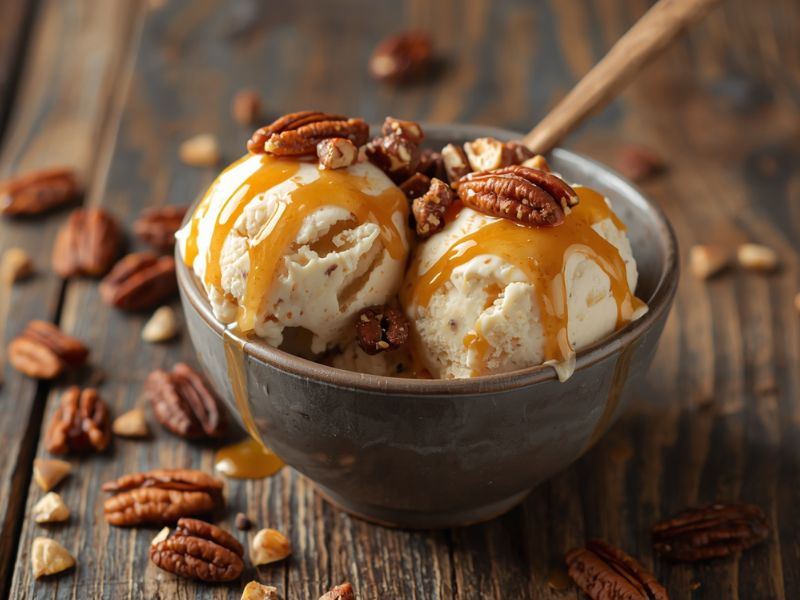
For a salted caramel ice cream version, add a small pinch of flaky sea salt over each serving. Start conservatively because the base already contains salt.
For extra caramel flavor, drizzle a small amount of cooled caramel sauce over the scoops just before serving. Do not add a large amount of warm sauce directly to the ice cream because it can soften the frozen dessert quickly.
Toasted pecans or walnuts add a pleasant crunch and work especially well with the buttery caramel flavor.
For a chocolate variation, fold in finely chopped chocolate during the final minute of churning. Small pieces are easier to eat once frozen.
You can also serve a scoop alongside warm brownies, apple crisp, or freshly baked cookies. The contrast between the warm dessert and cold ice cream makes a simple serving feel much more special.
How to Store Homemade Ice Cream
Transfer the finished ice cream to an airtight freezer-safe container as soon as possible after churning. Keep the container tightly sealed whenever it is returned to the freezer.
Pressing parchment paper against the surface of Caramel Ice Cream before closing the lid can help reduce direct exposure to air. This is useful because repeated exposure to air can contribute to ice crystals and freezer-related texture changes.
For the best quality, enjoy the ice cream within about 2 weeks, although it can remain frozen longer if stored properly. Homemade ice cream generally has its best texture when it has not been repeatedly thawed and refrozen.
If the ice cream becomes very firm, allow it to sit at room temperature for several minutes before scooping rather than trying to force a scoop through it. If you enjoy caramel-forward flavors, you’ll also love the crunchy toffee bits in our Butter Brickle Ice Cream recipe
Frequently Asked Questions
Can I make this caramel ice cream without an ice cream maker?
Yes, but the texture will be different. Pour the chilled mixture into a shallow freezer-safe container and freeze it. Stir thoroughly every 30 minutes during the first couple of hours to break up developing ice crystals, then allow it to freeze until firm. An ice cream maker generally produces a smoother result because it incorporates air while continuously freezing the mixture.
Why did my caramel become hard after adding the cream?
Caramel can seize when liquid is introduced, especially if the liquid is cold. This does not necessarily mean the batch is ruined.
Warm cream and gradual addition help prevent severe temperature shock. If the caramel becomes temporarily firm, gentle heat and steady whisking can usually help it smooth out again.
Can I turn this into salted caramel ice cream?
Absolutely. The base already contains salt, so start by tasting it once the caramel and custard are combined. If you want a stronger sweet-salty contrast, add a small amount of flaky sea salt before freezing or sprinkle it over individual servings.
Why is my homemade ice cream icy?
Ice crystals can develop when the base is not chilled properly, when the mixture freezes too slowly, or when the finished dessert is repeatedly exposed to warm air.
Use full-fat dairy, chill the base thoroughly, churn it while cold, and store the finished ice cream in a tightly sealed container.
Why is my ice cream too hard to scoop?
Homemade ice cream can freeze more firmly than commercial ice cream because it does not contain the same commercial stabilizers and processing methods.
Let the container sit at room temperature for several minutes before scooping. Keeping the ice cream well covered also helps maintain a better texture over time.
Can I add caramel sauce to the finished ice cream?
Yes. A small drizzle of cooled caramel sauce makes a great topping. You can also add a thin swirl before the final freezing stage, but avoid adding too much liquid because excessive sauce can make the ice cream softer and harder to freeze properly.
Conclusion
Making homemade caramel ice cream is mostly about paying attention to a few important details: develop the caramel carefully, cook the custard gently, chill the base completely, and give the churned ice cream enough time to firm up in the freezer. Those steps create a dessert with a deep caramel flavor and a rich, smooth texture that works beautifully on its own or alongside other desserts.
Once you are comfortable with the basic method, it is easy to make the recipe your own with flaky salt, toasted nuts, chocolate pieces, or an extra drizzle of caramel sauce. Keep the finished batch tightly covered in the freezer, let it soften slightly before scooping, and you will have a homemade frozen dessert ready whenever a caramel craving hits.