
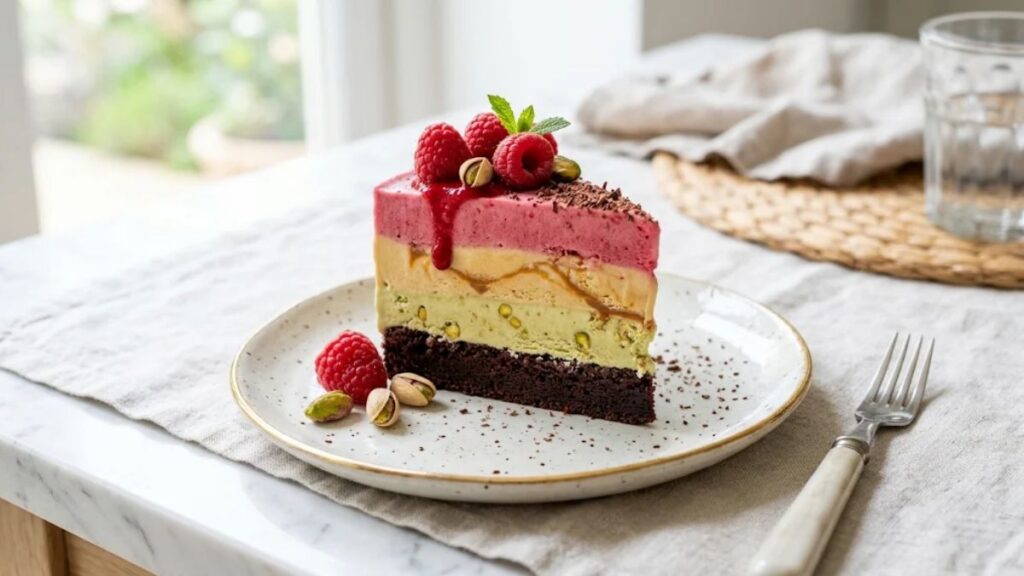
There is a distinct, nostalgic magic to cutting into a slice of chilled, creamy dessert on a hot summer afternoon, but traditional bakery-bought slabs often leave much to be desired. They are usually bogged down by overly sweet, artificial whipped toppings, uniform blocks of generic chocolate and vanilla, and a price tag that doesn’t match the quality. If you want a centerpiece dessert that actually excites your palate, you need an ice cream cake recipe that treats flavor and texture with intention.
Instead of relying on commercial shortcuts, crafting your own frozen dessert at home opens up a world of vibrant color profiles and gourmet flavor contrasts. This particular style steps away from monotonous grocery store slabs by combining a decadent, rich chocolate cake base with three distinct, whimsical tiers: nutty pistachio gelato, buttery salted caramel ice cream, and bright, tart raspberry sorbet, crowned with fresh summer berries. It is a striking, stunningly structured layered ice cream cake that looks like it came from an artisan gelateria, yet relies on simple, approachable home kitchen techniques. Whether you are hosting a weekend backyard gathering or celebrating a warm-weather birthday, this easy summer dessert delivers maximum impact with surprisingly straightforward assembly.
Why This Loaf Pan Ice Cream Cake Recipe Works
When tackling a frozen dessert, structural integrity is everything. Traditional springform pans can be messy, and managing circular layers in a towering mold often leads to melting disasters before the dessert even hits the freezer. That is why this technique utilizes a standard 9×5-inch metal loaf pan. A loaf pan provides the ideal rectangular geometry, perfect depth for clean, distinct stripes, and a confined footprint that makes precise loaf pan cake assembly completely foolproof.
Temperature management is the other secret weapon. By giving each tier its proper freezing time, you prevent the layers from bleeding into one another, resulting in sharp, bakery-quality architectural lines when you slice into it. Furthermore, utilizing smart parchment paper lining techniques guarantees that your frozen masterpiece releases effortlessly from the pan without tearing or sticking.
Quick Recipe Overview
| Parameter | Specification |
| Active Prep Time | 30 minutes |
| Baking Time | 18–22 minutes |
| Freezing Time per Layer | 3 to 4 hours (plus overnight final set) |
| Total Yield | 12 generous servings |
| Essential Tools | 9×5-inch loaf pan, parchment paper, offset spatula, serrated knife |
Essential Ingredients & Flavor Layering
A truly exceptional frozen treat relies on a thoughtful harmony of contrasting flavor notes—balancing sweet with salty, creamy with tart, and dense with refreshing. Because we want this project to be both luxurious and manageable, this ice cream cake recipe pairs a scratch-baked cake base with high-quality, store-bought frozen components.
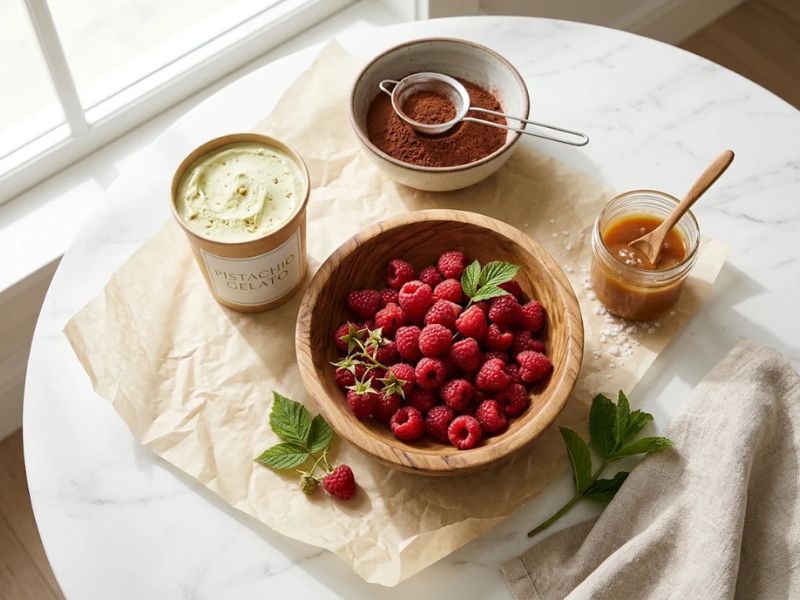
The Component Breakdown
- The Chocolate Base: A half-recipe of moist, rich vegan chocolate cake provides a sturdy, tender foundation that anchors the icy layers above it.
- Tier One (The Nutty Layer): One pint of premium pistachio gelato introduces an earthy, rich, and sophisticated depth.
- Tier Two (The Sweet & Salty Layer): One pint of salted caramel ice cream cuts through the richness with a luscious, buttery kick.
- Tier Three (The Tart Finish): One pint of vibrant raspberry sorbet brings a sharp, fruity acidity that balances the entire profile.
- The Garnish: Six ounces of fresh raspberries add a bright, aesthetic pop and a fresh bite right on top.
Shopping & Preparation Checklist
- 12\frac{1}{2}21 recipe of prepared vegan chocolate cake batter (using flour, cocoa powder, sugar, oil, and water or plant milk).
- 1 pint Talenti Pistachio Gelato (or your preferred local pistachio brand).
- 1 pint Salted Caramel Ice Cream (such as 365 Brand or a gourmet equivalent).
- 1 pint Raspberry Sorbet (ensuring a smooth, dairy-free fruit base).
- Fresh raspberries for decoration.
Understanding Texture: Gelato vs Ice Cream for Layering
When selecting your frozen components for a homemade ice cream cake, understanding the structural differences between gelato vs ice cream helps you balance texture, fat content, and melting points. Standard American ice cream is churned with a high percentage of cream and incorporates more air (known as overrun), which gives it a fluffy, lighter mouthfeel but causes it to melt relatively quickly at room temperature.
Gelato, on the other hand, typically uses more milk than cream and is churned at a much slower speed, incorporating far less air. This results in a denser, silkier texture with a more intense flavor delivery because fewer air bubbles coat your tongue. Sorbet contains no dairy at all, relying purely on fruit puree, sugar, and water, offering an icy, clean, palate-cleansing bite. Combining these three distinct textures in a single ice cream cake recipe means every spoonful offers a dynamic interplay of dense silkiness, creamy indulgence, and icy fruit refreshment.
Step-by-Step Assembly Instructions
Building a multi-tiered frozen dessert requires patience, but the actual hands-on time is quite minimal. Follow these step-by-step instructions carefully to achieve professional results.
Step 1: Baking & Trimming the Chocolate Cake Base
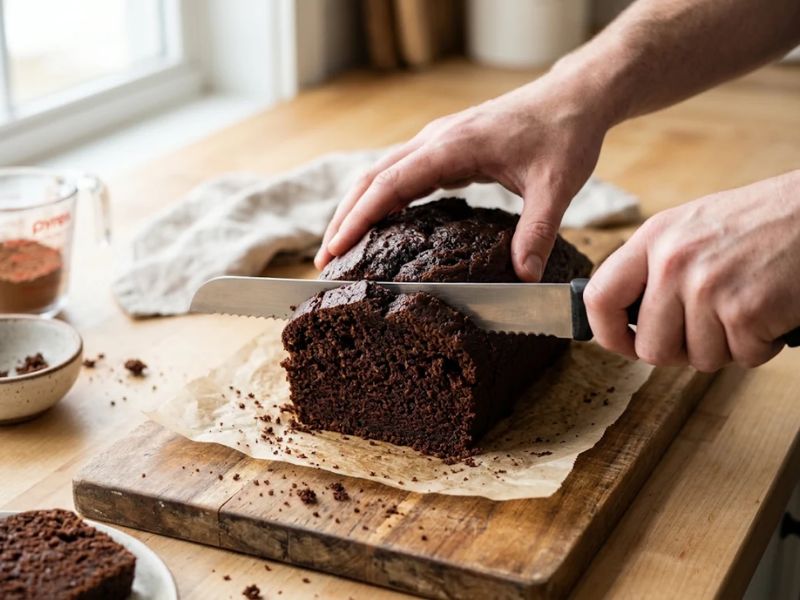
Preheat your oven to 350°F (175°C) and lightly grease a standard 9×5-inch metal loaf pan. Prepare a half-recipe of your favorite vegan chocolate cake batter. Pour the batter evenly into the prepared loaf pan and bake for 18 to 22 minutes, testing with a wooden toothpick inserted into the center until it comes out clean.
Allow the cake to cool completely inside the pan. Once cool, run a thin paring knife around the inner edges of the pan. Invert the pan, gently tapping it against your work surface to release the chocolate cake. Because the cake typically bakes with a slightly domed top, take a sharp serrated knife and carefully slice off the rounded top to create a perfectly flat, level surface. This simple step ensures even, clean horizontal stripes when you eventually cut your finished layered ice cream cake.
Step 2: Preparing the Loaf Pan (Parchment Hack)
Thoroughly wash and dry your 9×5-inch loaf pan. Lightly grease the interior with a neutral oil or butter, then line the bottom and long sides with a parchment paper sling, leaving an overhang on both sides. This parchment liner is your ultimate safety net; it ensures that after overnight freezing, you can lift or invert the entire frozen block smoothly. Place your leveled chocolate cake back into the bottom of the lined pan, pressing it gently into place. Transfer the pan to the freezer for at least 3 hours to ensure the cake base is thoroughly chilled before it meets any dairy.
Step 3: Softening and Spreading Layer 1 (Pistachio)
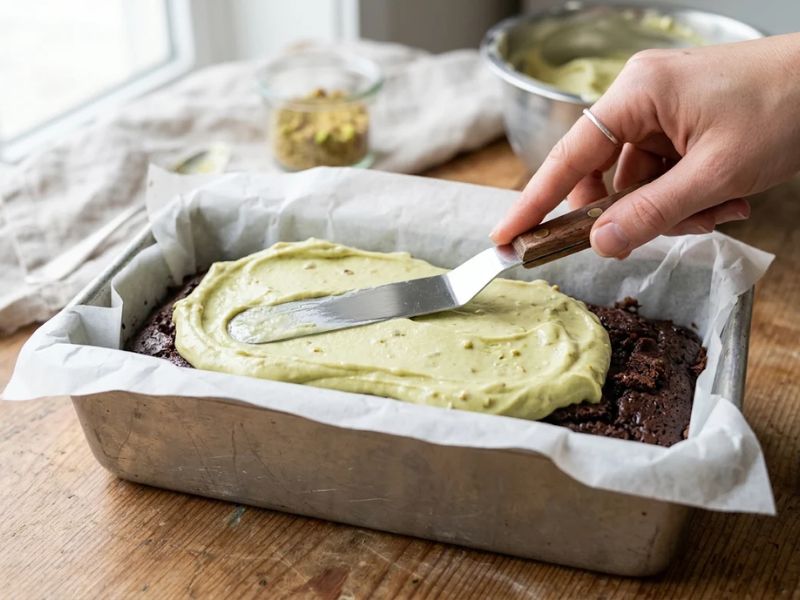
When your base cake is completely frozen, retrieve your first frozen component: the pint of pistachio gelato. Allow it to sit at room temperature for 10 to 15 minutes until it reaches a spreadable, softened consistency—similar to thick frosting. Transfer the softened gelato into a mixing bowl and stir vigorously with a spatula until it is completely smooth and uniform.
Pour the gelato directly over the frozen chocolate cake layer. Use an offset spatula to spread it evenly into the corners, smoothing the top flat. Return the loaf pan to the freezer for a full 4 hours. Do not rush this step; letting each tier freeze individually is the secret to a flawless easy summer dessert.
Step 4: Freezing & Adding Layer 2 (Salted Caramel)
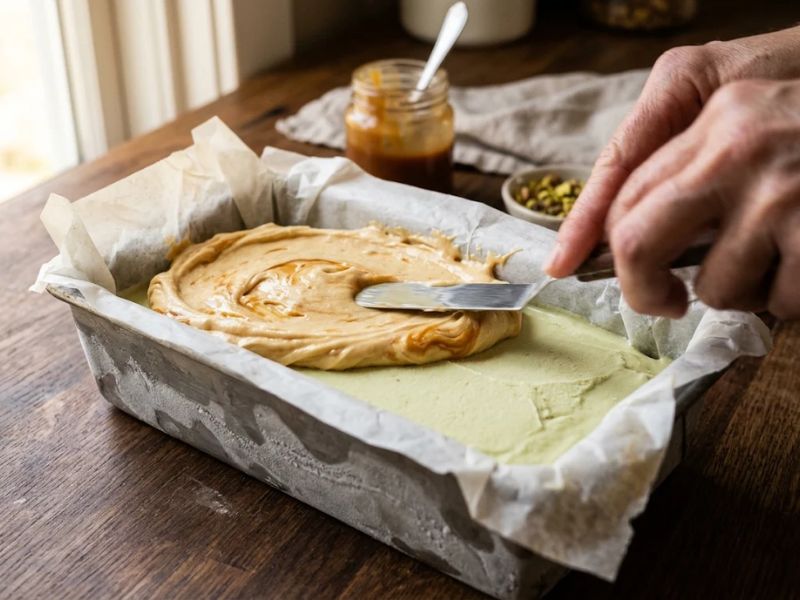
Once the pistachio tier is solid and firm to the touch, repeat the softening process with your pint of salted caramel ice cream. Let it temper on the counter until spreadable, stir it in a bowl to eliminate any icy crystals, and gently pour it over the hardened pistachio layer. Use your spatula to level it neatly across the surface. Return the loaf pan to the freezer for another 4 hours, allowing the caramel layer to lock into place.
Step 5: Adding the Final Top Layer & Fresh Garnish
For your final tier, soften your pint of raspberry sorbet. Spread the vibrant pink sorbet evenly over the salted caramel layer, smoothing the top carefully so it forms a clean edge against the parchment paper. Immediately before the final freeze, arrange your fresh raspberries decoratively across the top surface, pressing them slightly into the soft sorbet so they anchor securely as it freezes.
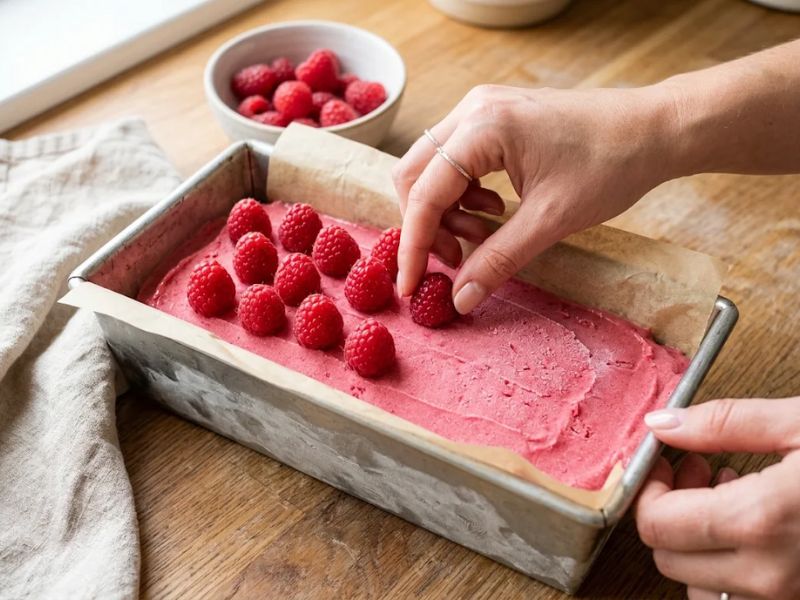
Step 6: Overnight Set and Perfect Slicing Techniques
Cover the top of the loaf pan loosely with parchment paper or foil, and place the entire assembly back into the freezer to set overnight. This extended resting time ensures all structural elements bind together firmly.
When you are ready to serve, let the loaf pan sit at room temperature for just 5 minutes to slightly release the edges. Run a warm knife around any exposed edges, then invert the pan onto a large cutting board or baking sheet, pulling gently on the parchment sling. Use a second baking sheet to flip the cake right-side up. For pristine slices, dip a sharp chef’s knife in hot water, wipe it completely dry between every single cut, and serve your ice cream cake recipe creations immediately while cold.
Customizing Your Layers: Creative Flavor Variations
One of the greatest joys of making a frozen masterpiece at home is the ability to customize every component to match your seasonal cravings or personal preferences. Whether you want a decadent chocolate-heavy profile or a bright tropical escape, the loaf pan method accommodates endless flavor combinations.
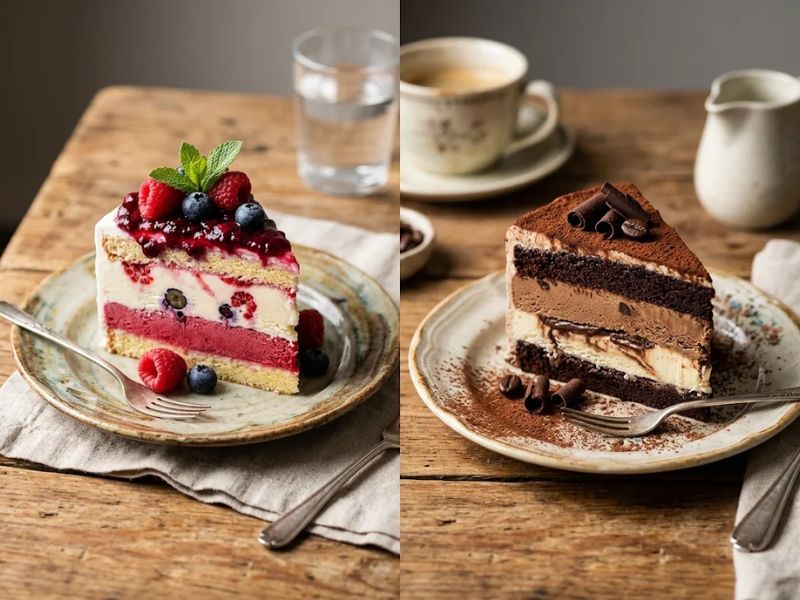
If you want an extra rich base, try using our favorite chocolate ice cream recipe for your bottom layer to amplify the cocoa intensity. For a fruity berry twist, you can swap the raspberry sorbet for creamy strawberry shortcake ice cream to give your middle or top tiers a nostalgic diner-style sweetness.
Flavor Pairing Guide
| Theme | Cake Base | Layer 1 | Layer 2 | Top Layer & Garnish |
| The Signature Original | Vegan Chocolate | Pistachio Gelato | Salted Caramel | Raspberry Sorbet + Fresh Raspberries |
| Tropical Summer | Coconut Sponge | Mango Sorbet | Macadamia Nut | Pineapple Sorbet + Toasted Coconut |
| Coffee & Cookies | Espresso Chocolate | Coffee Gelato | Fudge Swirl | Vanilla Bean + Crushed Cookies |
| Berry Orchard | Vanilla Sponge | Wild Blueberry | Lemon Sorbet | Blackberry Sorbet + Fresh Blackberries |
Pro Tips for Success & Troubleshooting Common Mistakes
Even the most straightforward kitchen projects benefit from a few insider tips to guarantee perfection on the first try. Keep these guiding rules in mind while building your ice cream cake recipe:
- Never skip the parchment sling: Trying to pull a frozen dairy block out of a metal loaf pan without parchment is nearly impossible without ruining your clean edges.
- Temper your ice cream correctly: If your ice cream is too hard when spreading, it will tear the layer beneath it. If it is too melted, your layers will blend together into a muddy soup. Aim for a smooth, spreadable peanut-butter consistency.
- Wipe your knife between slices: The secret to professional presentation is wiping your knife clean and warming it with hot water before every cut so the frozen fats don’t smear across your colored stripes.
- Storage longevity: Kept tightly wrapped in plastic wrap or an airtight container, your homemade creation will stay fresh in the freezer for up to one week without developing freezer burn.
Frequently Asked Questions (PAA Optimized)
Can I make this entire ice cream cake recipe completely vegan?
Yes, absolutely! The chocolate cake base is naturally vegan-friendly, and the market now offers incredible plant-based gelatos, oat-milk salted caramels, and fruit sorbets. Just ensure all your store-bought frozen pints use non-dairy bases.
How far in advance can I prepare this dessert for a party?
You can easily make this dessert up to 5 days in advance. Just ensure it is tightly wrapped in plastic wrap once fully frozen overnight to protect it from absorbing any ambient freezer flavors or odors.
Why did my ice cream layers bleed into each other?
Layer bleeding typically happens when an ice cream tier isn’t frozen solid enough (the full 3 to 4 hours) before the next warm layer is added, or if the subsequent layer was poured on while still too warm and fluid. Always let each tier set completely hard.
Can I use homemade ice cream instead of store-bought pints?
Of course! If you prefer churning your own bases in an ice cream machine, you can certainly use them. Just make sure your homemade bases are chilled thoroughly in the refrigerator before spreading them into the loaf pan.
Conclusion
Mastering a homemade frozen centerpiece doesn’t require professional pastry credentials just a bit of patience, quality ingredients, and a smart structural approach like the loaf pan method. By breaking down the assembly into manageable, timed freezing steps, you create a stunning, multi-textured dessert that beats any store-bought alternative. Grab your loaf pan, experiment with your favorite flavor combinations, and enjoy serving this ultimate ice cream cake recipe to impress everyone at your table.

I am an SEO Specialist with 2 years of experience in keyword research, on-page SEO, content optimization, and WordPress SEO. At Desserts Avenue, I focus on creating SEO-friendly content, improving search visibility, and helping readers find valuable dessert recipes and guides through organic search.