

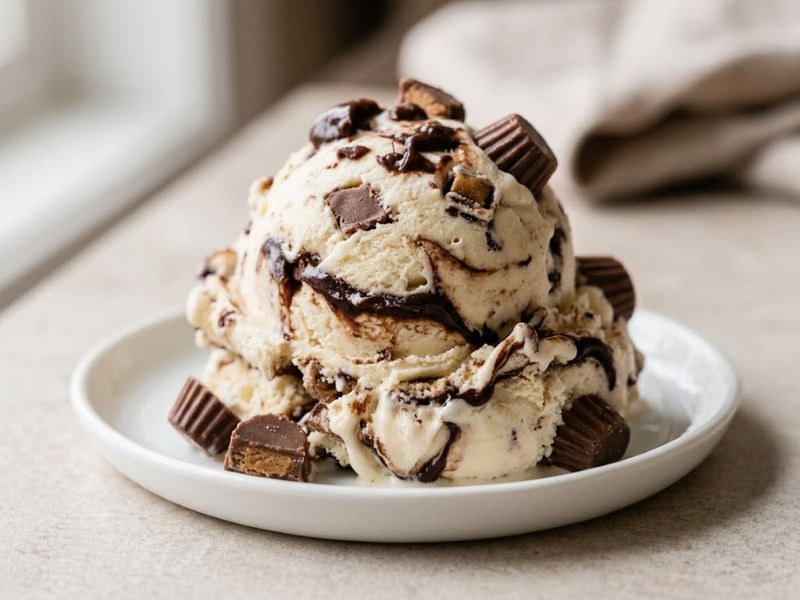
Moose Tracks Ice Cream combines a smooth vanilla base with ribbons of chocolate fudge and pieces of chocolate peanut butter cups. Every scoop brings together creamy sweetness, rich chocolate, and a little peanut butter crunch, making it a tempting choice for anyone who enjoys homemade frozen desserts.
The good news is that you do not need an ice cream maker to prepare this flavor at home. Heavy whipping cream and sweetened condensed milk create the base, while fudge sauce and peanut butter cups provide the familiar mix-ins. The method is straightforward, although giving the mixture enough time to freeze is essential for a scoopable result.
This recipe is designed for home cooks who want a simple dessert without cooking a custard or using specialized equipment. You will find ingredient quantities, step-by-step instructions, useful substitutions, storage advice, and tips for keeping the chocolate ribbons distinct. With a little preparation, you can make a batch ahead of a family meal, weekend gathering, or summer dessert night. This Moose Tracks Ice Cream version keeps preparation simple while bringing together the signature flavors in every scoop.
What Is Moose Tracks Ice Cream?
Moose Tracks is a flavor generally associated with vanilla ice cream, chocolate fudge, and chocolate peanut butter cups. The vanilla provides a sweet, creamy foundation, while the fudge creates rich chocolate ribbons and the candy pieces add a peanut butter center with a chocolate coating.
The combination is different from ordinary chocolate ice cream because the base stays vanilla rather than being chocolate throughout. Instead, the chocolate appears in pockets and swirls, giving each serving a slightly different balance of flavors.
Homemade versions can vary in their ingredients and proportions. This recipe uses a no-churn base, so it is a practical option for people who want to make the dessert without an ice cream machine.
Why You’ll Love This Homemade Recipe
- No ice cream machine: An electric mixer and a freezer-safe container are all you need for the main method.
- A familiar flavor combination: Vanilla, fudge, and peanut butter cups bring different textures and flavors together.
- Four main ingredients: The recipe keeps the ingredient list manageable.
- Easy to prepare ahead: The mixture can be assembled before you need to serve dessert.
- Simple to customize: You can adjust the amount of candy or fudge while keeping the basic method the same.
Ingredients You’ll Need
The main Moose Tracks Ice Cream ingredients are easy to measure and combine. For the best starting point, follow the quantities below before experimenting with extra mix-ins.
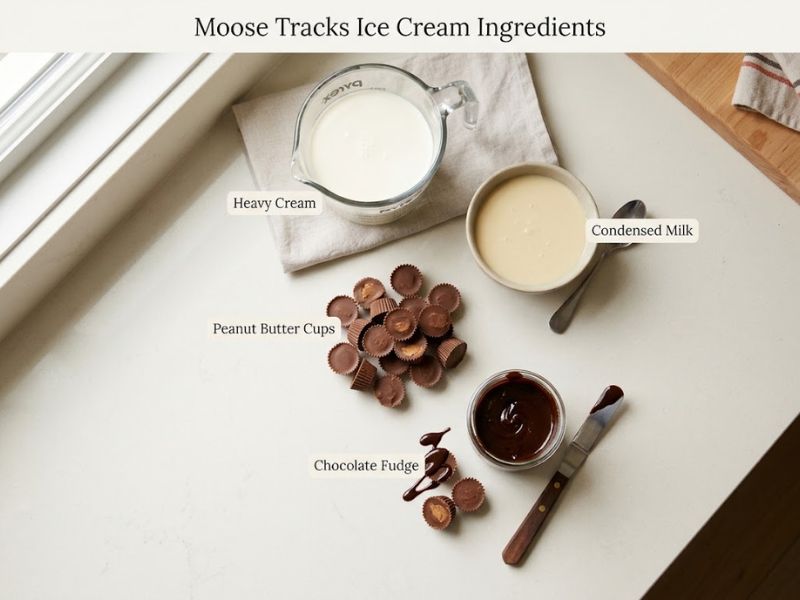
| Ingredient | Quantity | Purpose |
| Heavy whipping cream | 2 cups | Forms the airy, creamy base |
| Sweetened condensed milk | 1 can (14 ounces) | Sweetens the mixture and contributes to its texture |
| Mini chocolate peanut butter cups | 1 cup | Adds chocolate pieces with peanut butter filling |
| Thick chocolate fudge topping | ½ cup | Creates chocolate ribbons throughout the dessert |
Use heavy whipping cream that is suitable for whipping. Regular milk cannot replace it directly because it will not produce the same whipped structure.
Sweetened condensed milk is different from evaporated milk: it contains added sugar and has a thicker consistency. Use the specified product rather than substituting evaporated milk in equal quantities.
Mini peanut butter cups are convenient because they require little preparation. If using regular-sized cups, chop them into small, bite-sized pieces. Choose a thick fudge topping that can be drizzled without being watery.
If the fudge sauce requires warming, follow its package instructions and let it cool before layering it into the whipped mixture.
Ingredient Substitutions and Variations
Regular peanut butter cups: Chop them into smaller pieces so they distribute evenly and are easier to eat when frozen.
Different chocolate fudge topping: A thick chocolate fudge sauce can work in place of the suggested topping. Thin chocolate syrup may spread too easily and create less distinct ribbons.
More peanut butter flavor: Add a modest amount of extra peanut butter cup pieces. Too many solid mix-ins can make the finished dessert harder to scoop. For another way to enjoy this classic flavor combination, try our Peanut butter ice cream recipe, which puts peanut butter at the center of every scoop.
Dairy-free alternatives: Some dairy-free whipping products and condensed-milk alternatives are designed for frozen desserts. Their sweetness and whipping behavior differ, so the same quantities may not produce identical results.
Chocolate variation: You can use a chocolate-flavored peanut butter cup if available, but keep the vanilla base if you want the traditional contrast between vanilla, fudge, and candy pieces.
For your first batch, stick with the main recipe. Changing one ingredient at a time makes it easier to understand how each adjustment affects the result.
Equipment Needed
Prepare the following equipment before starting:
- Large mixing bowl
- Electric hand mixer or stand mixer
- Rubber spatula
- Measuring cups
- Small microwave-safe bowl, if the fudge needs warming
- 9 × 5-inch loaf pan or another freezer-safe container
- Lid or freezer-safe covering
A chilled mixing bowl and cold beaters can help the cream whip efficiently. Make sure the container is clean, dry, and large enough to hold the mixture without overflowing.
How to Make Moose Tracks Ice Cream
Follow the steps in order, keeping the whipped base airy and the fudge ribbons visible. For this Moose Tracks Ice Cream recipe, gentle folding and careful layering help maintain the creamy base and visible chocolate ribbons.
Step 1: Prepare the Peanut Butter Cups
Chop the peanut butter cups into small pieces if needed. Mini cups can be halved, while larger pieces should be cut into bite-sized chunks.
Set the prepared candy aside. Smaller pieces are easier to distribute throughout the mixture and less awkward to bite after freezing.
Step 2: Whip the Heavy Cream
Pour the cold heavy whipping cream into a large mixing bowl. Beat with an electric mixer until stiff peaks form.
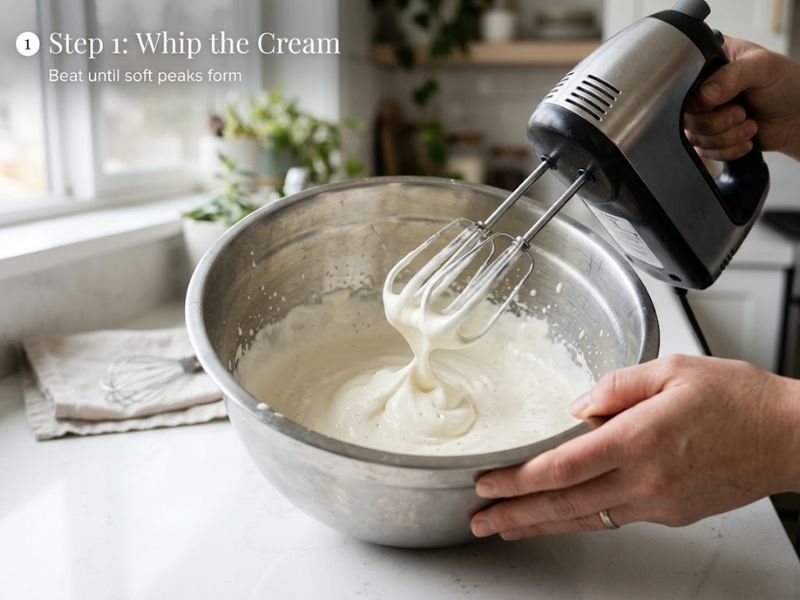
Lift the beaters to check the texture. The peaks should hold their shape rather than immediately falling over. Stop once the cream reaches this stage; overwhipped cream can become grainy and difficult to fold smoothly.
Step 3: Fold in the Sweetened Condensed Milk
Pour the sweetened condensed milk into the whipped cream. Use a rubber spatula to fold the ingredients together.

Bring the mixture from the bottom of the bowl over the top, turning the bowl as you work. Continue until the condensed milk is evenly incorporated. Avoid vigorous stirring because it can remove some of the air from the cream.
Step 4: Add the Peanut Butter Cups
Gently fold the chopped peanut butter cups into the mixture. Spread the pieces throughout the base so they are not concentrated in one area.
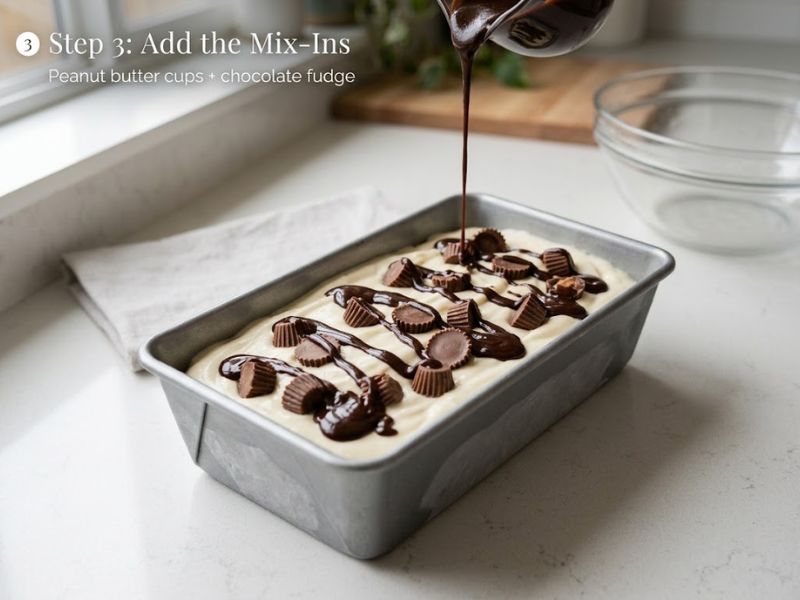
Try not to crush the candy while folding. Keeping the pieces intact gives the finished dessert more noticeable chocolate and peanut butter bites.
Step 5: Add the First Layer and Fudge
Spoon about half of the mixture into the freezer-safe container and smooth it gently.
Drizzle part of the fudge topping over the surface. The sauce should be cool enough that it does not melt the whipped mixture, yet soft enough to drizzle.
Step 6: Finish Layering and Create Swirls
Spread the remaining mixture over the first layer. Add the rest of the fudge topping across the surface.
Use a butter knife or skewer to make two or three gentle figure-eight motions. Stop once you can see ribbons of chocolate. Mixing too much will distribute the fudge throughout the base instead of leaving visible swirls.
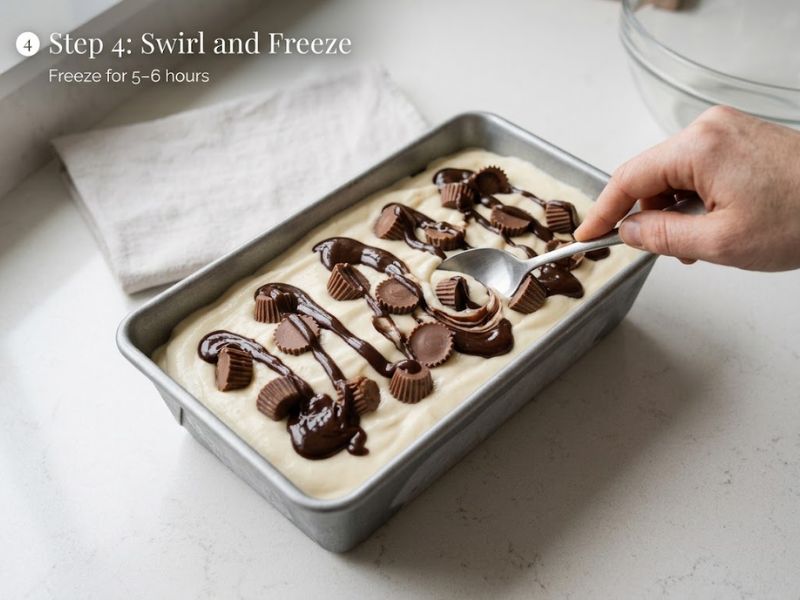
Step 7: Cover and Freeze
Cover the container securely and place it on a level freezer shelf.
Freeze for approximately five to six hours, or until the center is firm enough to scoop. The actual freezing time will depend on your freezer, container, and the temperature of the mixture when it goes in.
Recipe at a Glance
| Recipe Detail | Information |
| Prep Time | 15 minutes |
| Cook Time | 0 minutes |
| Freezing Time | 5–6 hours |
| Total Time | 5 hours 15 minutes–6 hours 15 minutes |
| Servings | Approximately 8 |
| Difficulty | Easy |
| Method | No-churn |
Times and serving yield are estimates and may vary depending on your equipment, container, and freezer.
Tips for Better Texture and Visible Fudge Swirls
- Keep the cream cold. Cold cream is easier to whip to the right consistency.
- Stop at stiff peaks. Beating beyond this point can make the cream grainy.
- Fold gently. A light touch helps retain air in the base.
- Cool the fudge before adding it. Hot sauce can soften or melt the surrounding mixture.
- Use a few swirl movements. Two or three gentle passes are usually enough to create ribbons.
- Freeze on a level shelf. This helps the mixture set evenly without spilling to one side.
Common Mistakes to Avoid
Overwhipping the cream: If the cream becomes grainy or begins separating, it has been beaten too far. Watch its consistency closely and stop once the peaks hold their shape.
Stirring away the fudge ribbons: Too much swirling turns the mixture uniformly chocolate-colored. Layer the fudge and move a knife through it only a few times.
Adding hot sauce: Warm fudge can melt the base and interfere with the texture. Allow it to cool before using it.
Using very large candy pieces: Large frozen pieces can be difficult to bite. Chop regular-sized peanut butter cups before folding them in.
Leaving the dessert uncovered: Air exposure can encourage ice crystals and allow the dessert to absorb freezer odors. Use a secure lid or suitable freezer covering.
How to Choose and Add the Fudge
The fudge topping has an important role beyond adding chocolate flavor: its thickness affects how easily it forms ribbons in the ice cream. Love desserts with a deeper chocolate flavor? Our Chocolate ice cream recipe is another delicious option for homemade ice cream fans.
A thick fudge sauce is generally easier to layer than a thin chocolate syrup. If the sauce is too firm to drizzle, warm it briefly according to the package directions, then let it cool before using it. If it is already pourable, there is no need to heat it.
Add the fudge in layers instead of pouring it all into the bowl at once. This gives you more control over where the chocolate appears and helps preserve the contrast between the vanilla base and the darker ribbons.
Serving Ideas
Serve a scoop in a chilled dessert bowl or waffle cone. For a simple presentation, add a few extra chopped peanut butter cups on top just before serving. A scoop of Moose Tracks Ice Cream can also be served with a simple chocolate cookie for an easy dessert pairing.

You can also serve it alongside brownies or a plain chocolate cookie. Since the ice cream is already sweet and rich, a small portion of an accompanying dessert is often enough.
If you are serving guests, take the container out of the freezer briefly before scooping if the mixture is too firm. Return it to the freezer promptly after serving.
Keep in mind that peanut butter cups contain peanuts and may contain other allergens depending on the brand. Check package labels and avoid serving them to anyone with a relevant allergy.
How to Store Homemade Ice Cream
Store the finished dessert in an airtight, freezer-safe container. For extra protection, place freezer-safe covering directly against the surface before securing the lid.
Keep the container in a consistently cold part of the freezer rather than the door, where temperatures may fluctuate more often. Avoid repeatedly allowing the entire container to soften and refreeze, as this can affect texture.
The dessert may become firmer after extended freezing. If it is difficult to scoop, let it stand briefly at room temperature before serving, then return the remaining ice cream to the freezer. For another fun frozen dessert with chocolate cookie flavor, our Oreo Ice Cream offers a delicious alternative to try next.
Frequently Asked Questions
1. What is Moose Tracks ice cream made of?
It is generally made with a vanilla ice cream base, chocolate fudge ribbons, and chocolate peanut butter cups. Homemade and commercial versions may use different proportions or additional ingredients.
2. Can you make Moose Tracks ice cream without an ice cream maker?
Yes. A no-churn version uses whipped heavy cream and sweetened condensed milk to create the base. The mixture is layered with fudge and candy pieces, then frozen in a suitable container.
3. How long does homemade Moose Tracks ice cream take to freeze?
Plan for approximately five to six hours for this recipe. Check that the center is firm before serving, since freezer performance and container size affect the timing.
4. Can you use store-bought fudge sauce?
Yes. Choose a thick fudge topping that can be drizzled or gently spread. If it needs warming, let it cool before adding it to the ice cream mixture.
5. How do you keep homemade ice cream soft enough to scoop?
Follow the ingredient proportions, whip the cream properly, and store the mixture in a well-covered container. If the ice cream freezes very firmly, let it soften briefly at room temperature before scooping.
Conclusion
Homemade Moose Tracks Ice Cream brings together vanilla, chocolate fudge, and peanut butter cups in a no-churn dessert that requires only a few main ingredients. Whip the cream carefully, fold the mixture gently, and layer the fudge without overmixing. After a few hours in the freezer, you will have a rich frozen treat ready to serve in bowls or cones.

I am an SEO Specialist with 2 years of experience in keyword research, on-page SEO, content optimization, and WordPress SEO. At Desserts Avenue, I focus on creating SEO-friendly content, improving search visibility, and helping readers find valuable dessert recipes and guides through organic search.