

Few frozen treats can match the velvet softness of authentic, French-style Custard Ice Cream. If you have ever wondered why high-end artisanal scoop shops deliver a texture that feels noticeably richer and more decadent than standard freezer-aisle tubs, the secret lies entirely in cooked egg yolks.
Egg yolks transform a simple mixture of dairy and sugar into a stable, silky emulsion. Beyond just adding fat, yolks contribute natural lecithin a powerful emulsifier that binds water and fat molecules tightly together. This structural magic minimizes large ice crystal formation, resulting in a dense, slow-melting frozen custard with an unmistakable golden hue and luxurious mouthfeel.
Making your own homemade custard ice cream recipe from scratch in your home kitchen gives you total control over ingredient quality. You can skip the high-fructose corn syrup, artificial stabilizers, and gums found in commercial pints, opting instead for pure heavy cream, farm-fresh eggs, real vanilla beans, and cane sugar. Once you master the fundamental techniques of scalding dairy and tempering egg yolks, you will be able to craft restaurant-grade frozen desserts effortlessly.
2. Custard Ice Cream vs. Regular (Philadelphia-Style) Ice Cream
To understand what makes frozen custard unique, it helps to contrast it with Philadelphia-style ice cream, as well as understanding the structural differences in gelato vs ice cream, where density and air overrun play a key role in mouthfeel. Philadelphia-style ice cream uses an uncooked, eggless base made simply of heavy cream, milk, sugar, and flavorings. It churns quickly, feels light on the palate, and showcases clean, bright fruit or mint flavors.
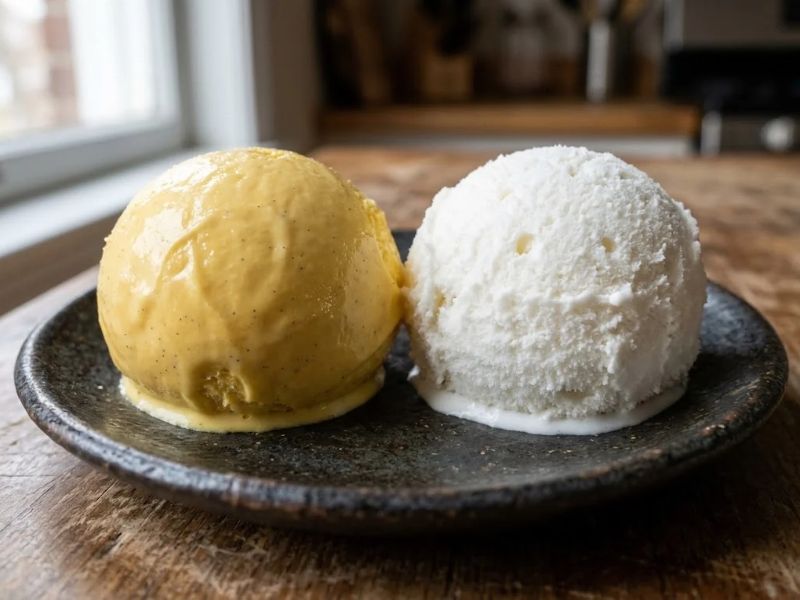
In contrast, French style ice cream relies on a gently cooked egg yolk ice cream base. Cooking the dairy with egg yolks thickens the liquid into a true crème anglaise (custard sauce). This creates a noticeably heavier body, a warm custardy flavor profile, and a texture that coats the back of a spoon smoothly.
| Feature | Custard Ice Cream (French Style) | Regular Ice Cream (Philadelphia Style) |
| Base Type | Cooked egg yolk custard (Crème Anglaise) | Uncooked cream, milk, and sugar mix |
| Egg Content | 5 to 8 large egg yolks per quart | Zero eggs (completely eggless) |
| Texture & Body | Extremely dense, velvety, chewy, slow-melting | Light, airy, clean melt on the tongue |
| Butterfat & Emulsion | High fat (14%–18%) with natural lecithin binding | Moderate to high fat (10%–14%) without egg emulsion |
| Air Overrun | Low overrun (15%–30% incorporated air) | Higher overrun (30%–50%+ incorporated air) |
| Flavor Profile | Deep, warm, rich, custard-forward | Bright, sharp, pure flavor delivery |
3. Essential Equipment & Kitchen Tools
Having the right tools set up before heating your dairy ensures a seamless cooking experience and prevents accidental overcooking.
- Heavy-Bottomed Saucepan: A thick 3-quart stainless steel or copper pan ensures even heat distribution, preventing the dairy and sugar from scorching on the bottom.
- Whisk & Heat-Resistant Silicone Spatula: A wire whisk is needed to beat egg yolks rapidly, while a flexible spatula scrapes the pan corners while cooking the custard.
- Digital Instant-Read Thermometer: Accurate temperature tracking is essential when making rich and creamy ice cream. You will need to hit precise temperature marks between 170°F and 180°F (77°C to 82°C).
- Fine-Mesh Sieve (Chinois): Straining the cooked custard removes tiny bits of chalazae (egg white strands) or accidentally cooked egg particles, guaranteeing a lump-free texture.
- Ice Bath Setup: A large mixing bowl filled with cold water and ice cubes, designed to hold a medium stainless steel bowl where the hot cooked custard will cool down immediately.
- Ice Cream Maker: An automatic compressor model or an insulated freezer-bowl unit to churn air into the chilled custard base.
4. Premium Ingredients & The Science Behind Them
Every ingredient in a Custard Ice Cream base plays a precise chemical role in balancing flavor, fat, moisture, and freezing points.
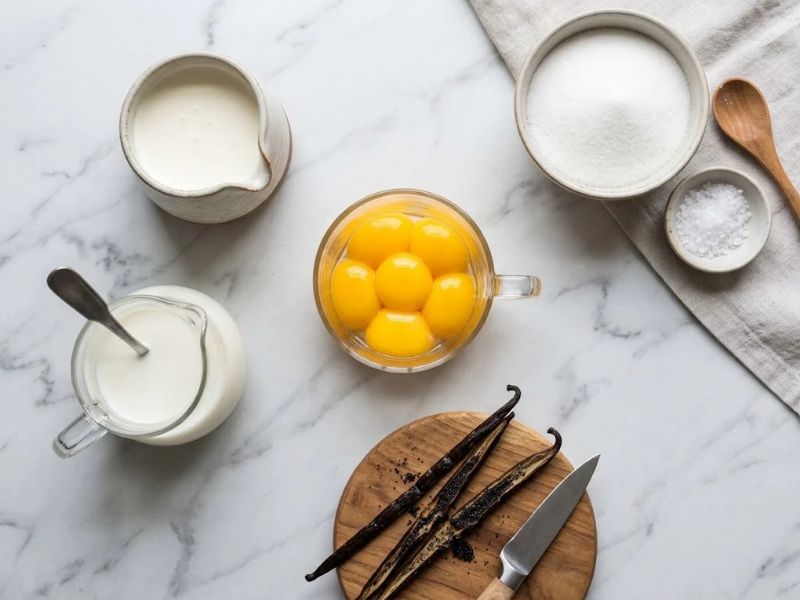
Heavy Cream & Whole Milk
Heavy cream (36% to 40% butterfat) provides body and richness, while whole milk (3.25% butterfat) balances the liquid ratio so the base doesn’t freeze into a solid brick of butter. Keeping fat around 16% to 18% overall yields optimal creaminess without masking flavors.
Egg Yolks
Egg yolks bring fat, proteins, and natural lecithin. Lecithin binds water droplets to fat globules, preventing large ice crystals from expanding during freezing. The proteins also coagulate gently when heated, creating a thick, velvety network.
Granulated Sugar
Sugar does far more than provide sweetness; it depresses the freezing point of water. Without enough sugar, the ice cream freezes rock-hard. Too much sugar prevents the mixture from freezing properly, leaving it soupy.
Pure Vanilla Extract & Fine Sea Salt
Pure vanilla extract adds aromatic depth, while a pinch of fine sea salt cuts through heavy fat and brightens the overall flavor profile.
Exact Ingredient Ratios Table
| Ingredient | US Customary Units | Metric Units | Function in Recipe |
| Heavy Cream ($36\%+$ fat) | 2 cups | 480 ml | Main butterfat source & creamy structure |
| Whole Milk ($3.25\%$ fat) | 1 cup | 240 ml | Hydration balance to control fat density |
| Large Egg Yolks | 6 yolks | 6 yolks (~110g) | Emulsifier, body, color, and custard flavor |
| Granulated White Sugar | 34 cup | 150 grams | Sweetness & freezing point depression |
| Pure Vanilla Extract | 1 tablespoon | 15 ml | Flavor enhancement |
| Fine Sea Salt | 14 teaspoon | 1.5 grams | Flavor balance & contrast |
5. Step-by-Step Instructions: From Scratch to Scoop
Follow this master guide step by step to build a perfectly thick, stable, scrambled-egg-free custard base.
Step 1: Scalding the Milk and Cream
Combine 2 cups of heavy cream, 1 cup of whole milk, and 1/4 teaspoon of fine sea salt in your heavy saucepan. Set over medium heat and warm until tiny bubbles form around the inner edges and steam rises—around 160°F to 170°F (71°C to 77°C). Do not bring it to a rolling boil. Remove from heat.
Step 2: Whisking Yolks and Sugar (Blanchir)
Place 6 egg yolks and 34 cup of granulated sugar into a clean glass or stainless steel mixing bowl. Whisk vigorously for 90 to 120 seconds until the mixture lightens in color to a pale, creamy yellow and forms a smooth ribbon when the whisk is lifted. This step coats the yolk proteins with sugar, creating a heat barrier.

Step 3: The Critical Tempering Process
How to temper eggs for ice cream without scrambling them is the most important skill in frozen dessert making.
- Hold a 1-cup liquid measuring cup in one hand and your whisk in the other.
- Scoop out approximately 12 cup of the hot dairy mixture.
- While whisking the egg yolk mixture constantly and rapidly, pour the hot dairy in a thin, steady stream into the eggs.
- Repeat this process with two more half-cups of warm dairy.
By gradually raising the temperature of the egg yolks, you prevent the yolk proteins from clumping or scrambling when introduced to the main pot.
Step 4: Cooking the Custard to Nappe Stage

Pour the warmed, tempered egg mixture back into the main saucepan with the remaining hot cream. Return the pan to medium-low heat. Cook continuously, stirring constantly with a heat-resistant silicone spatula, scraping the bottom and side corners of the pan.
Watch your digital thermometer closely. Continue stirring until the custard reaches 170°F–180°F (77°C–82°C). The mixture will thicken noticeably into a crème anglaise. To test for the nappe stage, dip a wooden spoon into the custard, draw your finger across the back of the spoon; if the line holds its shape clearly without the custard running into the streak, it is ready. Immediately remove from heat. Do not exceed 185°F (85°C).
Step 5: Straining and Rapid Cooling
Pour the hot custard sauce through a fine-mesh sieve set over a medium bowl sitting inside a larger ice bath (cold water and ice). Stir in 1 tablespoon of pure vanilla extract. Straining catches tiny specks of chalazae or accidental egg bits. Stir the custard over the ice bath for 5 to 10 minutes until the temperature drops below 70°F (21°C).
Step 6: Overnight Aging
Press a piece of plastic wrap directly onto the surface of the custard to prevent a rubbery skin from forming. Transfer the bowl to the coldest part of your refrigerator and let it rest for at least 8 hours, preferably 12 to 24 hours.
Aging allows the butterfat to re-crystallize, lets the milk proteins absorb water tightly, and fully rounds out the vanilla and egg flavors. Chilling the base to below 40°F (4°C) before churning is vital for maximum smoothness.
Step 7: Churning in the Machine
Pour the cold, aged custard base into your ice cream maker bowl (ensure freezer bowl units have been frozen solid for 24 hours). Turn on the machine and churn according to manufacturer directions typically 20 to 25 minutes. The ice cream is done when it reaches a soft-serve consistency and holds soft peaks on the paddle. If you do not own an automatic compressor unit, you can still easily make ice cream without an ice cream maker by using a whipped cream folding technique.

Step 8: Hardening / Ripening in the Freezer
Scoop the soft custard ice cream out of the churning bowl into a freezer-safe tub. Press parchment paper or wax paper directly onto the surface, seal with an airtight lid, and place in the back of your freezer at 0°F (-18°C) for 4 to 6 hours. This ripening phase firms up the ice cream so it can be scooped cleanly.
6. Pro Tips for Ultra-Smooth, Creamy Texture
- Preventing Large Ice Crystals: Always freeze your base rapidly. Fast freezing creates millions of tiny ice crystals rather than a smaller number of large ones, resulting in a smoother texture.
- The Alcohol Softness Trick: Add 1 tablespoon of neutral high-proof alcohol (like vodka) or a flavored liqueur (such as bourbon, rum, or Grand Marnier) to the cooled custard base right before churning. Alcohol does not freeze, which lowers the overall freezing point and keeps the ice cream easy to scoop right out of the freezer.
- Surface Contact Wrapping: Always press plastic wrap or parchment paper directly against the bare surface of hot custard during cooling and cold storage. This blocks evaporation and stops a dense surface skin from forming.
- High-Quality Eggs matter: Select fresh pasture-raised egg yolks. Richer yolks yield a deeper golden color, stronger emulsification, and a cleaner flavor profile.
7. Flavor Variations & Gourmet Mix-in Ideas
Once you master the classic French vanilla custard base, you can adapt this master recipe into numerous signature flavors.
- French Vanilla Bean: Split one whole Madagascar Bourbon vanilla bean lengthwise, scrape out the seeds with a paring knife, and add both the seeds and pod to the cream while scalding in Step 1. Strain out the pod before churning.
- Dark Chocolate Custard Base: Whisk 12 cup of unsweetened Dutch-process cocoa powder into the sugar before beating with egg yolks. Additionally, melt 4 ounces of fine $70\%$ dark chocolate directly into the scalded hot cream before tempering.
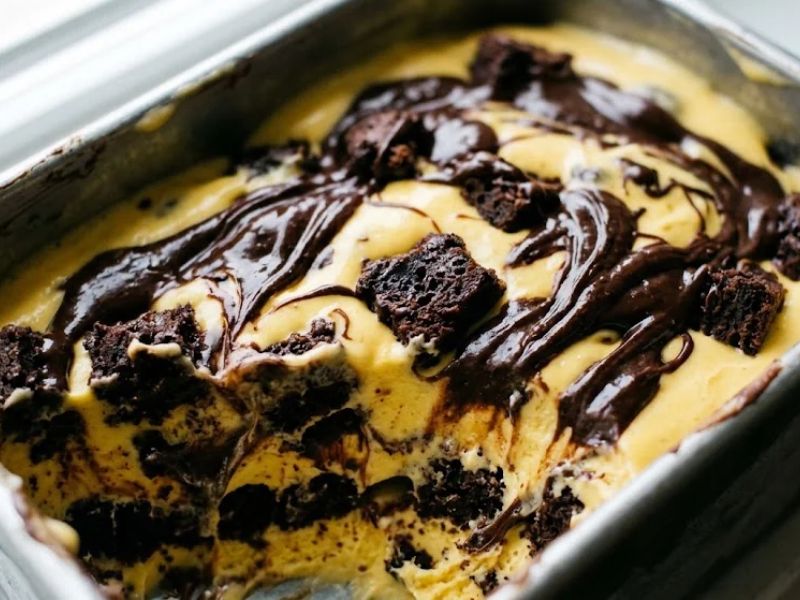
- Brownie Batter Swirl: Once you master the vanilla custard base, you can adapt it to rich dessert-inspired flavors like Brownie Batter Ice Cream by swirling in thick chocolate fudge and baked brownie pieces during the final two minutes of churning.
- Salted Caramel Swirl: Prepare a rich dark amber caramel sauce separately. Layer cold churned custard into your storage container, drizzling ribbons of cooled salted caramel sauce between layers, then swirl gently with a butter knife.
- Fresh Berry Compote: Simmer 1 cup of fresh raspberries or strawberries with 2 tablespoons of sugar and a squeeze of lemon juice until reduced. Cool completely and fold into the churned custard during the final 2 minutes of churning.
- Steeped Coffee Bean Infusion: Add 12 cup of coarsely cracked whole espresso beans to the hot cream, cover, and let steep off the heat for 30 minutes. Strain out the beans, re-warm the cream, and continue with the tempering steps.
8. Common Mistakes & Troubleshooting Guide
If your custard base turns out less than perfect, use this handy troubleshooting guide to identify and fix common issues:
| Problem | Root Cause | How to Fix / Prevent |
| Curdled / Scrambled Egg Base | The custard was overheated past 185°F (85°C), or warm milk was poured into yolks too quickly without tempering. | Strain through a fine sieve immediately. If curds are small, blend vigorously with an immersion blender for 60 seconds before chilling. |
| Grainy / Sand-like Texture | Sugar did not dissolve fully, or milk solids burned on the saucepan bottom during cooking. | Whisk sugar and yolks completely in Step 2. Cook over medium-low heat while constantly scraping the saucepan bottom with a flat-edge spatula. |
| Icy, Hard-to-Scoop Finish | Base was not chilled below $40^\circ\text{F}$ before churning, freezer temperature fluctuates, or low-fat dairy was used. | Use full-fat heavy cream and whole milk. Age the base overnight for 12 hours. Add 1 tbsp vodka or liqueur to lower freezing point. |
| Ice Cream Won’t Harden / Remains Soupy | Too much sugar or excess alcohol added, lowering the freezing point too drastically. | Stick strictly to specified sugar ratios (34 cup per quart). Keep total added alcohol to under 1.5 tablespoons per quart. |
9. Storage, Shelf Life & Serving Suggestions

Ideal Storage Containers
Store your hardened frozen custard in a shallow, wide-insulated tub or a silicone ice cream tub. Shallow containers encourage faster, uniform freezing, keeping ice crystal growth to a minimum. Avoid storing in cardboard containers for long periods, as cardboard absorbs moisture and lets freezer smells seep in.
Freezer Settings & Placement
Set your home freezer to 0°F (-18°C) or lower. Store the ice cream container in the back or bottom section of your freezer unit—never on the freezer door shelf, where frequent temperature spikes occur whenever the door opens.
Tempering Before Serving
Because authentic Custard Ice Cream is dense and fat-rich, it comes out of a standard $0^\circ\text{F}$ freezer quite firm. Transfer the container to your refrigerator for 5 to 10 minutes, or let it sit on the kitchen counter for 3 to 5 minutes before scooping. Tempering softens the fat slightly, making scooping easy and improving flavor release on the palate.
Serving Ideas
- Scoop into chilled glass coupes topped with fresh raspberries and toasted shaved almonds.
- Serve a warm slice of fresh apple pie or fruit crisp à la mode with a scoop of custard ice cream.
- Sandwich between warm, chewy chocolate chip cookies.
10. Frequently Asked Questions (FAQs)
Can I make a no-churn custard ice cream option without a machine?
Yes! To make a no-churn custard ice cream option, cook, strain, and cool your egg custard base completely in an ice bath. In a separate bowl, whip 1 cup of cold heavy cream to stiff peaks. Fold the whipped cream gently into the cooled custard base in three batches to keep the airy structure intact. Transfer to a loaf pan, cover tightly, and freeze for 6 hours until solid.
What should I do with the leftover egg whites?
Do not discard the 6 leftover egg whites! Store them in an airtight container in the refrigerator for up to 4 days (or freeze for 3 months). Use them to bake crisp meringues, light angel food cakes, macaron shells, or a high-protein breakfast egg-white omelet.
How long does homemade custard ice cream last in the freezer?
When stored in an airtight container with wax paper pressed directly onto the surface, homemade custard ice cream maintains peak flavor and texture for up to 2 to 3 weeks. Beyond 3 weeks, it remains safe to eat, but surface ice crystals may form over time.
Can I use pasteurized cartons of liquid egg yolks instead of fresh eggs?
Yes, carton liquid egg yolks work fine for making custard base. Use approximately 6 tablespoons of carton egg yolks to replace 6 whole large egg yolks.
Why did my custard skin over while cooling?
A thin, rubbery skin forms when moisture evaporates from the surface of hot milk proteins exposed to air. Prevent this by pressing plastic wrap or parchment paper directly onto the surface of the hot liquid as soon as you finish straining it into your cooling bowl.
Conclusion
Mastering authentic French-style Custard Ice Cream at home comes down to three key steps: properly scalding your dairy, carefully tempering the egg yolks, and aging the base overnight. By following this masterclass guide, you get a velvety, restaurant-quality frozen custard without any artificial stabilizers. Use this simple homemade custard ice cream recipe as your base, and feel free to customize it with your favorite mix-ins and gourmet flavors.

I am an SEO Specialist with 2 years of experience in keyword research, on-page SEO, content optimization, and WordPress SEO. At Desserts Avenue, I focus on creating SEO-friendly content, improving search visibility, and helping readers find valuable dessert recipes and guides through organic search.