

If you have ever sneaked a big spoon of raw cake batter straight out of the mixing bowl when no one was looking, this recipe is dedicated to you. There is something endlessly comforting about that distinct, buttery, vanilla-laced flavor of cake batter. Combining that nostalgic taste with a rich, velvety frozen cream base takes dessert to an entirely different level.
Making authentic cake batter ice cream at home is easier than you think, and you do not need a culinary degree to pull it off. Whether you own an electric ice cream maker or want a simple no-churn method using basic kitchen equipment, this comprehensive guide covers every single step, tip, and secret to achieving creamery-quality results right in your kitchen.
Why You Will Love This Recipe
- Pure Nostalgic Flavor: Tastes exactly like classic yellow cake batter combined with sweet, cold cream.
- Dual Method Options: Includes instructions for traditional churned ice cream and an easy 3-ingredient no-churn version.
- Heat-Treated Safety: Uses properly heat-treated cake mix to ensure the base is completely safe to consume without raw flour risks.
- Fully Customizable: Easy to customize with rainbow sprinkles, chocolate chips, crushed sandwich cookies, or fudge swirls.
- Ideal Texture: Soft, scoopable, and rich without turning icy or hard in the freezer.
What Does Cake Batter Ice Cream Taste Like?
The defining characteristic of true cake batter ice cream is its signature sweet, buttery, and slightly tangy flavor profile. Unlike standard vanilla ice cream which relies heavily on vanilla bean extract cake batter ice cream uses actual cake mix or a blend of yellow cake flavors, butter extract, and sweet cream.
When made correctly, the texture is dense and smooth, while the flavor balances milk solids, sweet sugar, and the distinct aroma of baked birthday cake. Adding rainbow sprinkles gives it a slight crunch and vibrant visual appeal. If you love rich batter flavors, don’t miss our indulgent Brownie Batter Ice Cream.
Safety First: How to Heat-Treat Cake Mix
Standard commercial cake mix contains raw wheat flour. Raw flour can carry bacteria like E. coli and Salmonella, which means it must be heat-treated before being added to unbaked or unboiled recipes like ice cream bases.

Microwave Method (Fastest)
- Place the required amount of dry cake mix into a heat-safe glass bowl.
- Microwave on high in 25-second intervals, stirring thoroughly between each burst.
- Check the temperature using an instant-read digital thermometer. It must reach 160°F (71°C) throughout.
- Let it cool completely before sifting to remove any lumps.
Oven Method
- Preheat your oven to 350°F (175°C).
- Spread the dry cake mix evenly across a rimmed baking sheet lined with parchment paper.
- Bake for 5 to 7 minutes, stirring halfway through.
- Verify the center reaches 160°F (71°C), then cool and sift completely.
Key Ingredients & Substitutions

| Ingredient | Purpose | Best Substitution / Tip |
| Heavy Whipping Cream | Creates structure and rich fat base (36%+ fat content). | Do not substitute with low-fat milk or half-and-half. |
| Whole Milk | Blends with cream in churned recipes to balance fat ratio. | Full-fat whole milk works best for churned bases. |
| Sweetened Condensed Milk | Provides sweetness and prevents ice crystals in no-churn versions. | Store-bought full-fat sweetened condensed milk. |
| Yellow Cake Mix | Delivers the authentic cake batter flavor. | White cake mix or Funfetti cake mix works great too. |
| Pure Vanilla Extract | Enhances sweet dairy tones. | Pure vanilla extract or vanilla bean paste. |
| Butter Extract | Adds that signature bakery-style richness. | Optional, but highly recommended for depth. |
| Rainbow Jimmies | Adds color and texture without bleeding into the cream. | Use classic cylinder-shaped sprinkles, not nonpareils. |
Baker’s Tip: Avoid using nonpareil sprinkles (the tiny round ball sprinkles). Their dye dissolves rapidly upon contact with wet cream, turning your vibrant ice cream into a muddy grey mixture. Always stick to thick rainbow jimmies!
Method 1: Traditional Churned Cake Batter Ice Cream
If you own an ice cream maker, this method produces the lightest, most authentic churned texture with small air cells and a smooth finish.

Prep Time & Yield
- Prep Time: 15 minutes (plus cooling time)
- Churn Time: 20–25 minutes
- Freezing Time: 4–6 hours
- Yield: 1.5 quarts (approx. 8 servings)
Ingredients
- 2cups heavy cream (chilled)
- 1cup whole milk (chilled)
- 34cup granulated sugar
- 23cup yellow cake mix (heat-treated and sifted)
- 1tsp pure vanilla extract
- 12tsp butter extract
- 18tsp fine sea salt
- 12cup rainbow jimmies sprinkles
Step-by-Step Instructions
- Prepare the Base: In a large mixing bowl or blender, combine the chilled whole milk, granulated sugar, heat-treated cake mix, vanilla extract, butter extract, and sea salt. Whisk vigorously until the sugar and cake mix are fully dissolved.
- Incorporate Cream: Whisk in the cold heavy whipping cream until smooth. Cover the bowl with plastic wrap and chill in the refrigerator for at least 1 to 2 hours (a colder base churns much faster and yields smaller ice crystals).
- Churn: Pour the chilled mixture into your ice cream maker drum (ensure the bowl has been frozen for 24 hours beforehand). Churn according to the manufacturer’s directions, usually 20 to 25 minutes, until it reaches a soft-serve consistency.
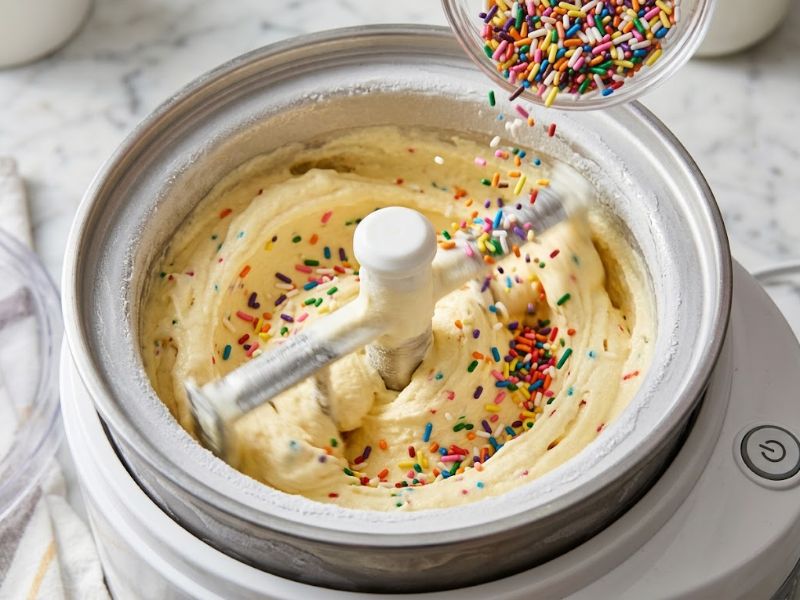
- Fold in Mix-ins: During the last 2 minutes of churning, gently pour in the rainbow jimmies so they distribute evenly without breaking down.
- Freeze & Harden: Transfer the soft ice cream into a freezer-safe container (such as an insulated ice cream tub or a loaf pan). Press a sheet of wax paper directly onto the surface to prevent ice crystals from forming. Freeze for at least 4 to 6 hours before scooping.
Method 2: Easy No-Churn Cake Batter Ice Cream
No churn machine? No problem. If you love quick frozen treats, learn how easy Ice cream without an ice cream maker can be. This simple method comes together in under 10 minutes using basic kitchen tools and delivers an extraordinarily creamy texture.
Ingredients
- 2cups heavy whipping cream (cold)
- 1can(14oz) sweetened condensed milk (chilled)
- 23cup yellow cake mix (heat-treated and sifted)
- 1tsp pure vanilla extract
- 12cup rainbow jimmies sprinkles
Step-by-Step Instructions
- Mix Flavor Base: In a medium bowl, whisk together the chilled sweetened condensed milk, heat-treated cake mix, and vanilla extract until completely smooth and lump-free. Set aside.
- Whip Heavy Cream: In a separate large chilled bowl using a hand mixer or stand mixer fitted with a whisk attachment, whip the heavy cream on medium-high speed until stiff peaks form (about 3 to 4 minutes).
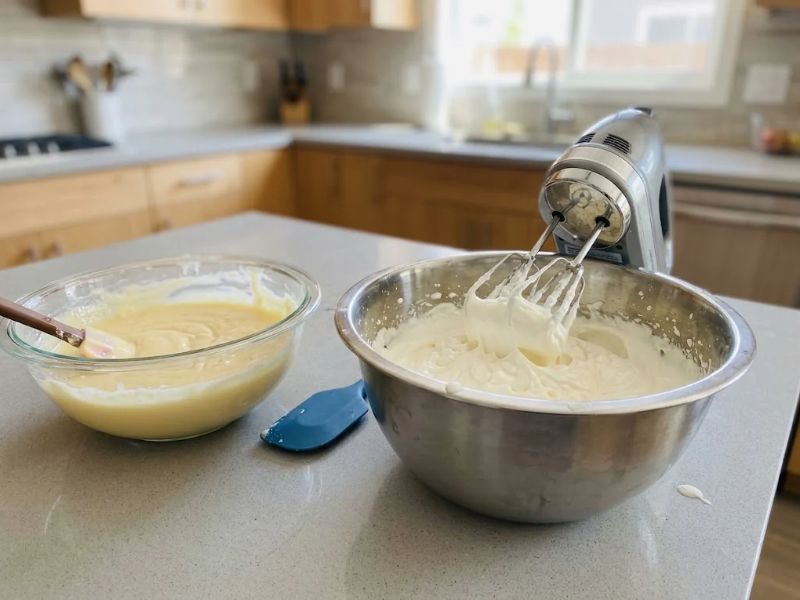
- Lighten & Fold: Take a third of the whipped cream and whisk it directly into the condensed milk mixture to lighten it. Then, gently fold the remaining whipped cream into the base using a rubber spatula. Work slowly so you do not deflate the air trapped in the cream.
- Add Sprinkles: Lightly fold in the rainbow sprinkles until evenly distributed.
- Freeze: Spoon the mixture into a 9×5-inch metal loaf pan or airtight container. Smooth the top with a spatula, cover tightly with foil or plastic wrap, and freeze for 6 hours or overnight.
Method Comparison: Churned vs. No-Churn
| Feature | Traditional Churned | No-Churn Method |
| Equipment Needed | Ice cream maker required | Electric hand mixer or stand mixer |
| Active Time | 25 minutes + Churning | 10 minutes |
| Texture Profile | Light, airy, classic creamery style | Rich, dense, custard-like texture |
| Sweetness Level | Balanced sweetness | Slightly sweeter due to condensed milk |
| Storage Life | 2 to 3 weeks in freezer | 2 weeks in freezer |
Delicious Mix-in Variations & Flavor Tweaks
While classic rainbow sprinkles are the traditional choice, you can easily customize this base with these crowd-pleasing additions:
- Birthday Cake Fudge Swirl: Layer hot fudge sauce or chocolate ganache into the ice cream container before freezing.
- Golden Oreo Crunch: Fold in 1cup of coarsely chopped Golden Oreos or classic vanilla sandwich cookies. For cookie lovers, you can also check out our creamy Oreo Ice Cream recipe
- Red Velvet Twist: Replace yellow cake mix with heat-treated red velvet cake mix and swirl in whipped cream cheese frosting.
- Funfetti Cookie Dough: Drop tiny bite-sized pieces of edible funfetti cookie dough into the cream right before freezing.
- Strawberry Shortcake: Swirl in fresh strawberry puree or strawberry jam for a fruity contrast to the rich cake base.
Fun & Creative Serving Ideas
Taking your cake batter ice cream to the next level is all about how you present it. Whether you are hosting a birthday party or serving a weekend treat, here are a few delicious ways to serve it:
Ice Cream Cake Layer: Use it as the middle frozen filling between two layers of actual baked yellow cake for an incredible homemade ice cream cake.
Funfetti Waffle Cones: Dip the edges of waffle cones in melted white chocolate and immediately roll them in rainbow jimmies before scooping.
Birthday Cake Ice Cream Sandwiches: Scoop a generous portion between two soft-baked yellow cake cookies or sprinkle sugar cookies.
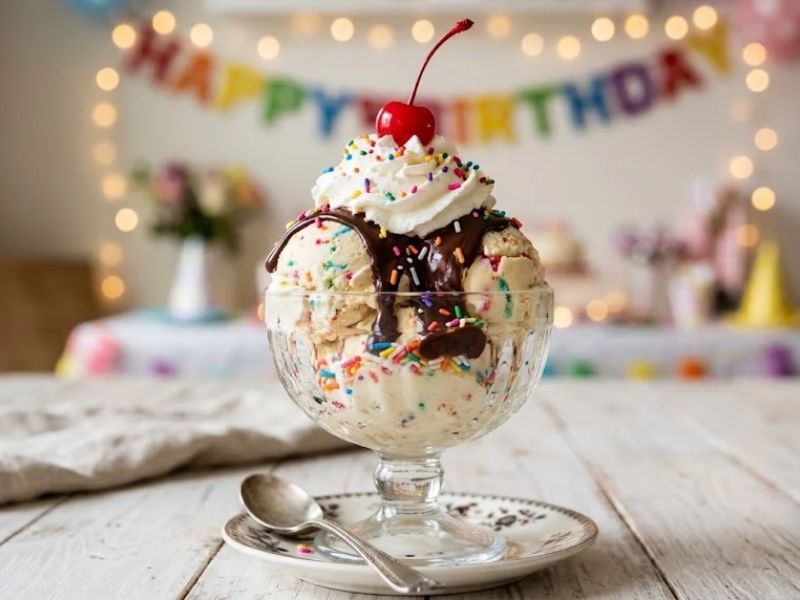
Cake Batter Sundae: Serve in a glass dish topped with warm hot fudge sauce, whipped cream, extra sprinkles, and a maraschino cherry.
Party Ice Cream Float: Add a big scoop into a glass of chilled cream soda or root beer for a sweet, fizzy celebration drink.
Nutritional Information
The values below are estimates based on 1 serving (approx. 1/2 cup) of the traditional churned version.
| Nutrient | Amount Per Serving | % Daily Value |
| Calories | 310 kcal | – |
| Total Fat | 18 g | 23% |
| Saturated Fat | 11 g | 55% |
| Cholesterol | 55 mg | 18% |
| Sodium | 140 mg | 6% |
| Total Carbohydrates | 33 g | 12% |
| Dietary Fiber | 0 g | 0% |
| Sugars | 26 g | – |
| Protein | 4 g | 8% |
How to Store Homemade Cake Batter Ice Cream
Proper storage is the key to maintaining that velvety, scoopable creaminess and preventing freezer burn or harsh ice crystals from ruining your dessert.
- Use Shallow, Airtight Containers: Store your ice cream in a shallow, wide freezer-safe container or a traditional insulated ice cream tub. Shallow containers help the ice cream freeze and maintain an even temperature.
- The Wax Paper Trick: Press a piece of parchment paper, wax paper, or plastic wrap directly onto the surface of the ice cream before snapping the lid shut. This eliminates air exposure, which is the primary cause of freezer burn.
- Store in the Deepest Part of the Freezer: Keep your ice cream container in the back or bottom section of your freezer rather than inside the door. Temperature fluctuations from opening and closing the freezer door cause the ice cream to melt slightly and refreeze, leading to an icy texture.
- Optimal Shelf Life: While commercial ice creams contain heavy stabilizers, this fresh homemade cake batter ice cream is best enjoyed within 2 to 3 weeks for maximum flavor and creaminess.

Pro Tip: If your ice cream becomes too firm in the freezer, never microwave it! Simply let the container sit at room temperature on your kitchen counter for 5 to 10 minutes before scooping.
Troubleshooting Common Ice Cream Issues
1. Why Is My Ice Cream Grainy?
Graininess usually happens if the dry cake mix did not dissolve completely in the liquid base, or if the cake mix wasn’t sifted after heat-treating. Always sift dry ingredients through a fine-mesh strainer and whisk the liquid base thoroughly before churning or whipping.
2. Why Did the Colors Bleed?
If your ice cream turns pink, blue, or purple, you likely used nonpareil sprinkles or added the sprinkles too early in the mixing process. Always use high-quality sugar jimmies and gently fold them in as the very last step.
3. Why Is My Frozen Ice Cream Hard as a Rock?
Homemade ice cream lacks commercial stabilizers, so it freezes harder than store-bought brands. If your freezer runs extremely cold, let the container sit on the kitchen counter for 5 to 10 minutes before scooping.
Frequently Asked Questions (FAQs)
Can I make cake batter ice cream without cake mix?
Yes. If you do not have store-bought cake mix, you can substitute it with a combination of 12cup heat-treated all-purpose flour, 2tbsp dry milk powder, 14cup granulated sugar, and 12tsp extra butter extract.
Can I use gluten-free cake mix?
Gluten-free yellow or white cake mix works exceptionally well in this recipe. Make sure to still heat-treat gluten-free flour blends to eliminate any raw grain risks.
How long does homemade cake batter ice cream last in the freezer?
When stored in an airtight container with a piece of plastic wrap or wax paper pressed directly onto the surface, it will remain fresh and ice-crystal-free for up to 2 to 3 weeks.
Can I use egg yolks to make a custard base?
Yes. If you prefer a French-style custard base, cook egg yolks, milk, and sugar into a light custard on the stove first. Whisk in the heat-treated cake mix once removed from heat, cool completely, and churn as directed.
Conclusion
You don’t need a trip to a local scoop shop to enjoy authentic, creamery-quality cake batter ice cream. By spending just a few minutes heat-treating your cake mix for safety, you can easily unlock that nostalgic, buttery birthday cake flavor right in your own kitchen.
Whether you prefer the light, airy finish of the traditional churned method or the quick, 3-ingredient convenience of the no-churn technique, this recipe delivers a velvety, rich scoop every single time. Fold in plenty of rainbow jimmies, customize it with your favorite mix-ins, and enjoy the ultimate homemade dessert whenever a sweet craving hits!

I am an SEO Specialist with 2 years of experience in keyword research, on-page SEO, content optimization, and WordPress SEO. At Desserts Avenue, I focus on creating SEO-friendly content, improving search visibility, and helping readers find valuable dessert recipes and guides through organic search.