
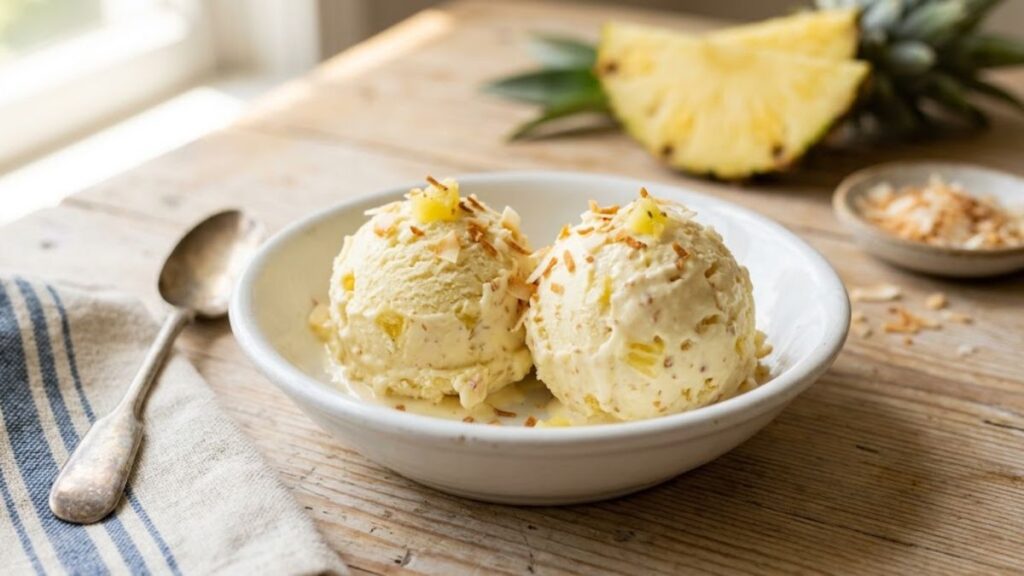
Some days you just want something cold, sweet and a little tropical, and you don’t want to deal with custard, eggs or a machine. That’s exactly why I love this no churn pineapple ice cream. You whip some cream, fold in a few pantry staples, and let the freezer do the rest.
This is a pineapple ice cream without an ice cream maker. All you need is a bowl, a mixer and a loaf pan. The result is creamy, scoopable and full of sweet-tangy pineapple flavour. Below you’ll find the recipe, the small details that stop it from turning icy, and fixes for the most common problems.
Quick Recipe Overview
This no churn pineapple ice cream is built on three main ingredients. It takes about 15 minutes of hands-on work, and the freezer does the rest.
| Detail | Info |
| Prep time | 15 minutes |
| Freeze time | 6 to 8 hours |
| Total time | About 8 hours 15 minutes |
| Servings | 10 to 12 |
| Difficulty | Easy |
| Method | No churn |
| Storage life | Up to 2 weeks in the freezer |
This no churn pineapple ice cream is a good pick for beginners, for summer gatherings, and for anyone without an ice cream machine.
Why You’ll Love This No Churn Pineapple Ice Cream
- No machine needed. A hand mixer and a loaf pan are all you need for no churn pineapple ice cream.
- Only three main ingredients. Cream, condensed milk and pineapple do all the work, with a little vanilla and salt for balance.
- Creamy and scoopable. Whipped cream adds air, so you get a soft texture straight from the freezer after a short rest.
- Real tropical flavour. Pineapple with condensed milk gives a sweet, slightly tangy taste that feels like a holiday dessert.
- Easy to make ahead. You can prepare it the night before guests arrive and forget about it.
Ingredients You’ll Need
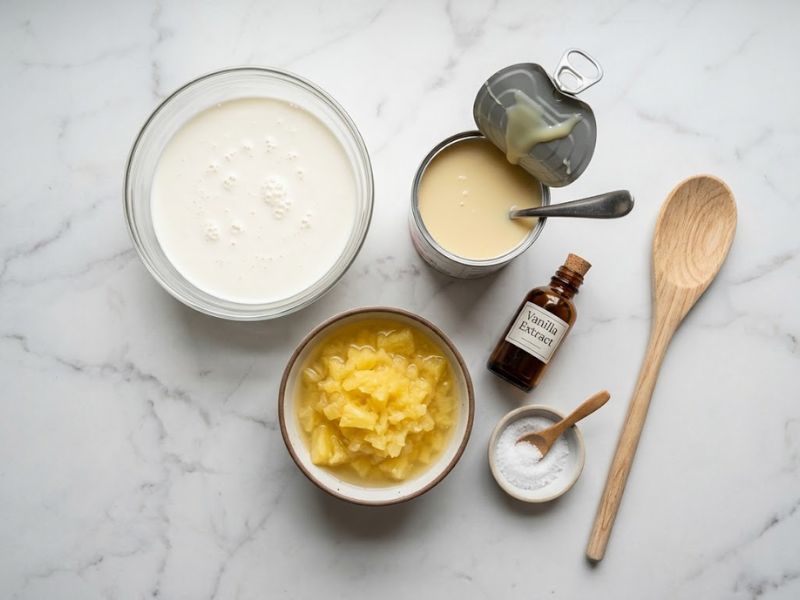
With only a handful of ingredients, there’s nowhere to hide. I always use cold cream straight from the fridge and a fresh can of condensed milk.
| Ingredient | Amount | Why it matters |
| Heavy whipping cream | 2 cups (480 ml), cold | Whips into soft air bubbles that replace churning |
| Sweetened condensed milk | 1 can (14 oz / 397 g), cold | Adds sweetness and keeps the texture smooth |
| Canned crushed pineapple | 20 oz (565 g), well drained | Gives the main flavour |
| Vanilla extract | 1 teaspoon | Rounds out the flavour |
| Salt | 1 small pinch | Balances the sweetness |
Ingredient Substitutions
| Original | Substitute | What changes |
| Canned crushed pineapple | Fresh pineapple, cooked and cooled | Brighter flavour, but needs extra prep |
| Heavy whipping cream | Any whipping cream that whips to stiff peaks | Texture depends on the fat content |
| Sweetened condensed milk | Sweetened condensed coconut milk | Dairy-free base with a mild coconut taste |
| Vanilla extract | A drop of coconut or lemon extract | Slightly different flavour |
Tip: Chill your mixing bowl and beaters for 15 to 20 minutes. I skipped this once on a hot afternoon, and the cream took forever to thicken.
Equipment You’ll Need
| Equipment | Why you need it | Alternative |
| Hand or stand mixer | Whips the cream quickly | Whisk (takes longer) |
| Large mixing bowl | Gives room for whipping | Any wide bowl |
| Rubber spatula | Folds gently without deflating the cream | Large spoon |
| 9×5 loaf pan | Freezes evenly | Freezer-safe container |
| Parchment paper | Prevents ice crystals on top | Plastic wrap |
| Sieve or colander | Drains the pineapple | Clean kitchen towel |
Can I Use a Whisk Instead of a Mixer?
Yes, but expect to whip for 10 to 15 minutes and get a sore arm. Chill the bowl well and keep going until the cream holds stiff peaks.
How No Churn Ice Cream Works
Regular ice cream is churned to add air and keep ice crystals tiny. In a no churn recipe, whipped cream adds the air, and condensed milk provides the sugar and fat that keep the mixture smooth.
| Ingredient | Role in texture |
| Whipped cream | Adds air so it stays light |
| Condensed milk | Sweetens and keeps ice crystals small |
| Pineapple | Adds flavour and a little moisture |
| Salt and vanilla | Balance and round out the taste |
Because of the sugar and fat, no churn pineapple ice cream doesn’t freeze rock hard, so it stays scoopable. Want to try other flavours with this method? Here’s my guide to making ice cream without an ice cream maker.
Canned vs Fresh Pineapple for Ice Cream
When making no churn pineapple ice cream, fresh pineapple causes trouble because it contains an enzyme called bromelain. It breaks down proteins, including the ones in dairy, and can make ice cream thin, bitter or oddly textured. Canning heats the fruit, which deactivates this enzyme. That’s why canned pineapple is the safer choice for this recipe.
If you’d like to use fresh pineapple, chop it small, cook it gently for a few minutes, let it cool, and drain it well.
| Type | Texture | Flavour | Effort | Best for |
| Canned crushed | Soft, evenly spread | Sweet and mild | Very low | Beginners |
| Canned chunks (chopped) | Bigger bites | Sweet | Low | Chunky ice cream |
| Fresh, cooked | Soft to slightly fibrous | Bright and tangy | Medium | Fresh-fruit lovers |
Important: Drain the pineapple thoroughly. Extra juice is the number one reason for an icy texture.
How to Choose the Right Pineapple
Pick pineapple packed in juice rather than heavy syrup, since syrup makes the ice cream sweeter. Crushed pineapple spreads evenly through no churn pineapple ice cream and is my top pick. If you use fresh, choose one that smells sweet at the base and feels slightly heavy for its size.
How to Make No Churn Pineapple Ice Cream
Step 1: Chill the Pan and Bowl
Place your 9×5 loaf pan in the freezer for about 30 minutes. While the pan chills, set your mixing bowl and beaters in the fridge too. Cold tools make whipping easier and help the ice cream set evenly.
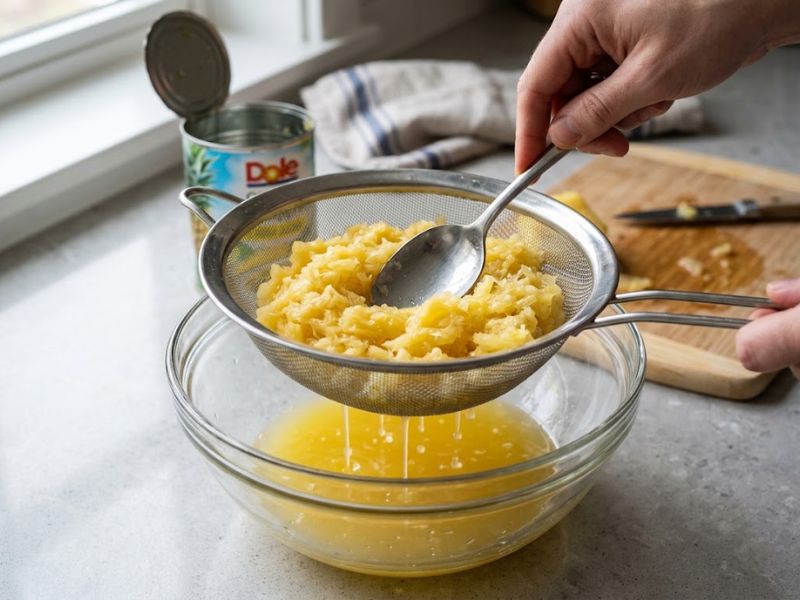
Step 2: Drain the Pineapple
Tip the crushed pineapple into a sieve and press it with the back of a spoon. Let it drain for about 10 minutes, pressing once or twice. You want it damp, not dripping.
Step 3: Whip the Cream
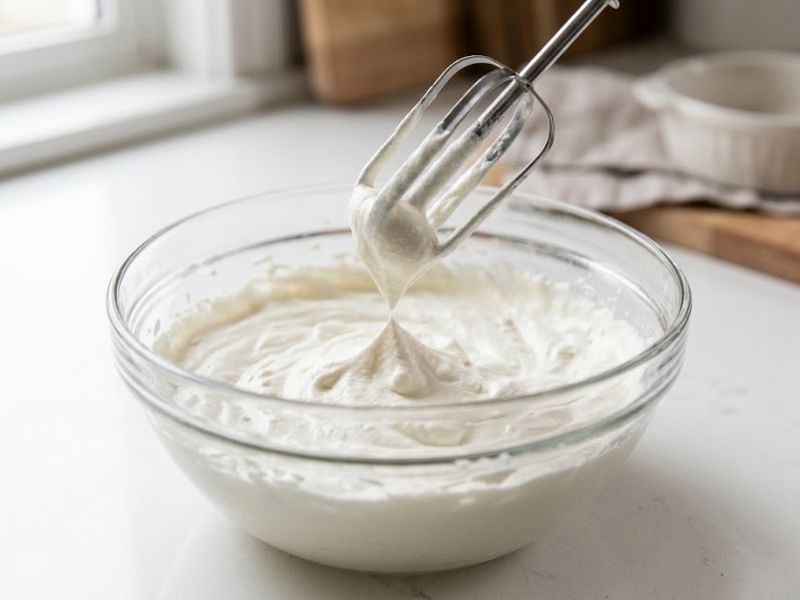
Take the cream straight from the fridge and pour it into your chilled bowl. Beat on medium-high for 3 to 4 minutes, until stiff peaks form and the cream holds its shape when you lift the beaters. Stop right there, because over-whipping makes it grainy.
Step 4: Fold in the Condensed Milk
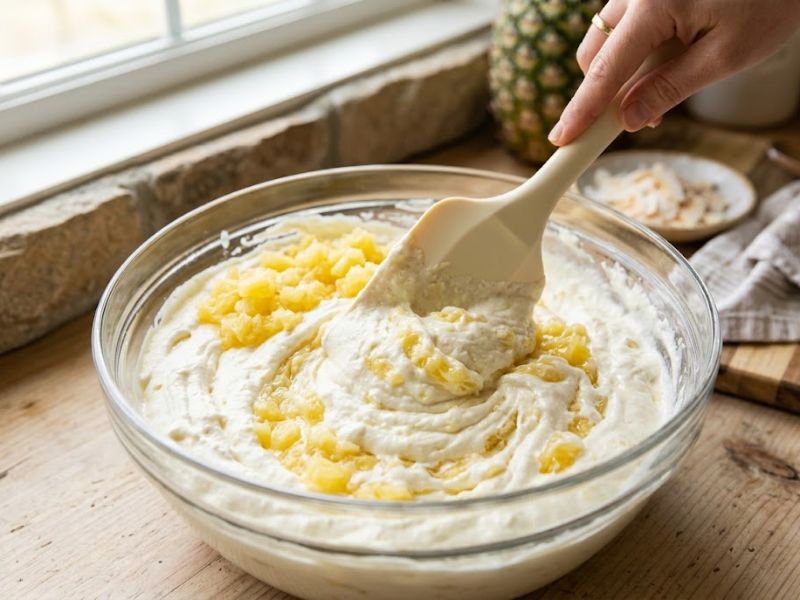
Add the cold condensed milk, vanilla and salt. Fold gently with a spatula, scooping from the bottom. Stop when no streaks remain.
Step 5: Fold in the Pineapple
Add the drained pineapple and fold until evenly spread. Don’t stir hard, or you’ll lose the air you worked to create.
Step 6: Freeze and Serve
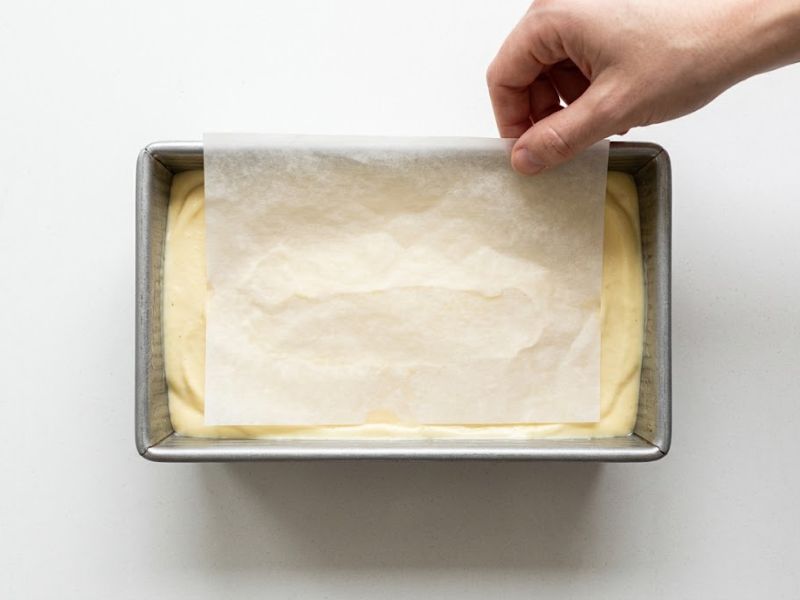
Spoon the mixture into the chilled loaf pan and smooth the top. Press parchment paper onto the surface, then cover. Freeze your no churn pineapple ice cream for at least 6 hours, ideally overnight. Let it sit at room temperature for 5 to 10 minutes before scooping.
What the Mixture Should Look Like
- After whipping: thick, fluffy and holding stiff peaks
- After folding in condensed milk: smooth, pale and airy, like a thick mousse
- Before freezing: creamy with pineapple evenly spread, not runny
What I Learned Testing This Recipe
- Drain the pineapple properly. My first batch turned icy because I drained the pineapple for only a minute. Pressing it in a sieve for about 10 minutes gave a much creamier result.
- Stop whipping at stiff peaks. Going past that made the mixture slightly grainy. About four minutes with a hand mixer was enough.
- A chilled pan helps. A loaf pan kept in the freezer for 30 minutes helped the mixture set evenly.
- Balance the sweetness. It was quite sweet for my taste, so a pinch of salt and a squeeze of lemon juice brightened the flavour.
- Be patient. It was scoopable after about 6 hours and fully firm overnight.
Tips for the Creamiest Homemade Pineapple Ice Cream
- Keep everything cold. Cold cream whips better and holds more air.
- Don’t over-whip. Stop at stiff peaks, or the texture turns grainy.
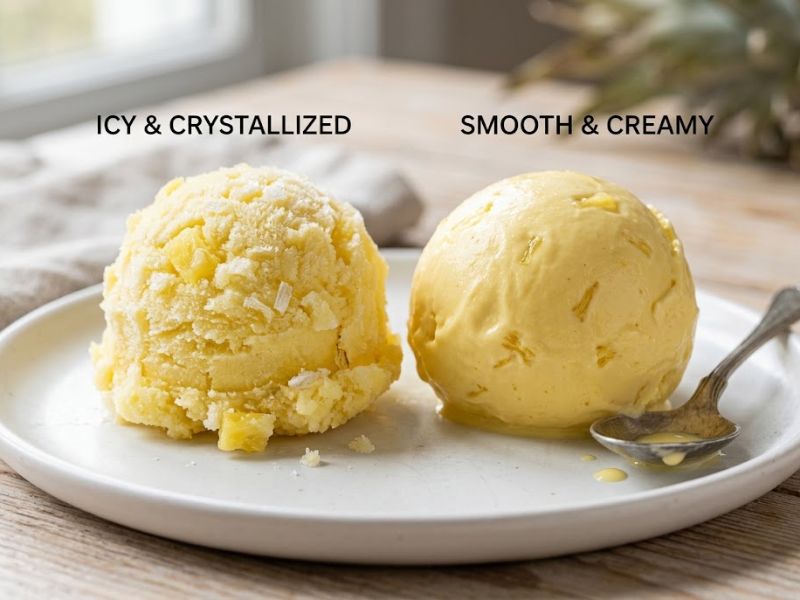
- Drain well. Extra liquid forms large ice crystals.
- Fold gently. Harsh stirring knocks out air, and the ice cream turns dense.
- Press parchment on top. It blocks air and stops a frosty layer from forming.
- Use a shallow container. It freezes faster and more evenly than a deep one.
- Let it rest before scooping. Five to ten minutes makes it easy to scoop.
Common Problems and Fixes
| Problem | Why it happens | How to fix it |
| Icy ice cream | Too much pineapple juice | Drain and press the pineapple longer |
| Too soft or won’t freeze | Under-whipped cream or too much liquid | Whip to stiff peaks, and freeze longer |
| Runny mixture | Warm cream or bowl | Chill everything before starting |
| Grainy texture | Over-whipped cream | Stop at stiff peaks |
| Bitter taste | Raw fresh pineapple enzyme | Use canned, or cook fresh pineapple first |
| Too sweet | Condensed milk and syrupy fruit | Add lemon juice and a pinch of salt |
Easy Variations to Try
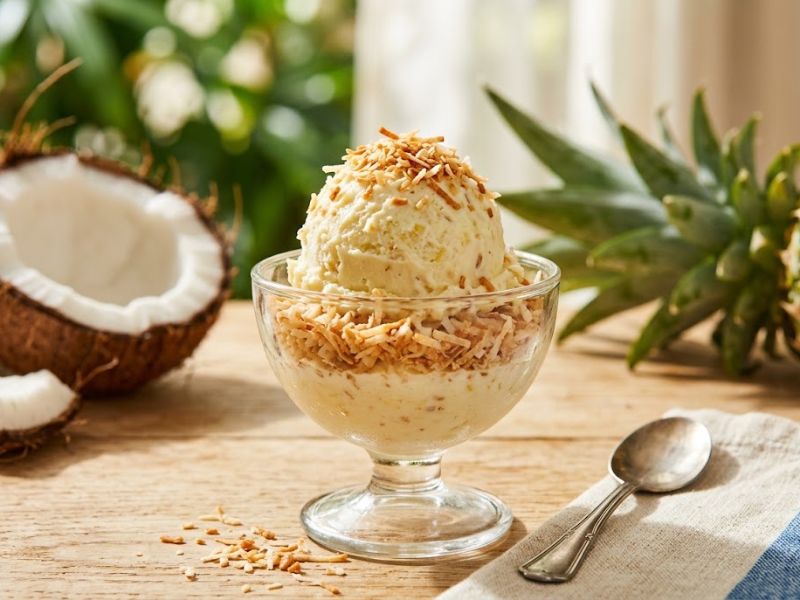
Pineapple Coconut
Fold in 1/2 cup toasted shredded coconut. It adds a nutty crunch and a piña colada feel. If you love that flavour, you’ll also enjoy my coconut ice cream.
Pineapple Mint
Add 1/2 teaspoon mint extract, or finely chopped fresh mint. The flavour turns cool and refreshing.
Pineapple Cream Cheese
Beat 4 oz softened cream cheese into the condensed milk before folding. It gives a slight cheesecake tang.
Pineapple Swirl with Graham Crumbs
Layer the ice cream with crushed graham crackers as you fill the pan. You get a pie-like crunch.
Dairy-Free Version
Use chilled coconut cream and sweetened condensed coconut milk. The flavour is milder, and the texture is slightly softer.
| Variation | Extra ingredient | Flavour result |
| Coconut | Toasted coconut | Tropical and nutty |
| Mint | Mint extract | Cool and fresh |
| Cream cheese | 4 oz cream cheese | Tangy and rich |
| Graham swirl | Crushed graham crackers | Pie-like crunch |
| Dairy-free | Coconut cream and coconut condensed milk | Mild coconut taste |
How to Store Pineapple Ice Cream
Keep the ice cream in an airtight container with parchment paper pressed onto the surface. For the best texture, eat it within two weeks. If it’s too hard, leave it on the counter for 5 to 10 minutes. Avoid refreezing melted ice cream, since the texture suffers.
| Method | Duration | Tip |
| Loaf pan with parchment and lid | Up to 2 weeks | Press parchment on the surface |
| Airtight container | Up to 2 weeks | Fill it so there’s less air space |
| Individual cups | Up to 2 weeks | Good for portion control |
Nutrition Information
These are approximate values for one serving, based on 12 servings per batch. Numbers change with brands, so treat them as estimates.
| Nutrient | Approx. per serving |
| Calories | 260 |
| Total fat | 17 g |
| Saturated fat | 11 g |
| Carbohydrates | 22 g |
| Sugar | 21 g |
| Protein | 3 g |
| Sodium | 45 mg |
This is a sweet treat, so enjoy it in moderation.

Frequently Asked Questions
Can I make pineapple ice cream without an ice cream maker?
Yes. This recipe uses whipped cream instead of churning. You only need a mixer, a bowl and a loaf pan.
Can I use fresh pineapple?
You can, but cook it briefly first, then cool and drain it. Raw fresh pineapple contains bromelain, which can affect the dairy and cause a bitter taste.
Why is my no churn ice cream icy?
Usually the pineapple wasn’t drained well, or the cream was under-whipped. Press the fruit in a sieve and whip the cream to stiff peaks.
How long does it take to freeze?
Plan for at least 6 hours. Overnight gives the firmest, easiest-to-scoop result.
Can I make it without condensed milk?
It’s hard to get the same texture. Condensed milk provides sugar and smoothness. Coconut condensed milk is the best swap.
Is it safe to eat?
Yes. This recipe has no raw eggs, only cream, condensed milk and canned fruit.
How many servings does it make?
About 10 to 12 scoops, depending on how generous you are.
Can I add other fruits?
Yes, but keep them small, well drained and limited to one or two add-ins. Coconut and cherries go well with pineapple, and mango works too. For a full mango recipe, try my mango ice cream.
Conclusion
This no churn pineapple ice cream proves that a creamy, tropical dessert doesn’t need special equipment. Drain the pineapple well, stop whipping at stiff peaks, and give it enough time in the freezer, and you’ll get a smooth, scoopable result. If you try it, leave a comment or a rating below and tell me how yours turned out.

I am an SEO Specialist with 2 years of experience in keyword research, on-page SEO, content optimization, and WordPress SEO. At Desserts Avenue, I focus on creating SEO-friendly content, improving search visibility, and helping readers find valuable dessert recipes and guides through organic search.